什么是 Feign
Feign 是 Spring Cloud Netflix 组件中的一个轻量级 RESTful 的 HTTP 服务客户端,实现了负载均衡和 Rest 调用的开源框架,封装了 Ribbon 和 RestTemplate,实现了 WebService 的面向接口编程,进一步降低了项目的耦合度。
Feign 内置了 Ribbon,用来做客户端负载均衡调用服务注册中心的服务。
Feign 本身并不支持 Spring MVC 的注解,它有一套自己的注解,为了更方便的使用,Spring Cloud 孵化了 OpenFeign。
Feign 是一种声明式、模板化的 HTTP 客户端(仅在 Consumer 中使用)。
Feign 支持的注解和用法请参考官方文档:https://github.com/OpenFeign/feign 或 spring.io 官网文档
Feign 的使用方式是:使用 Feign 的注解定义接口,调用这个接口,就可以调用服务注册中心的服务。
Feign 解决什么问题
Feign 旨在使编写 JAVA HTTP 客户端变得更加容易,Feign 简化了 RestTemplate 代码,实现了 Ribbon 负载均衡,使代码变得更加简洁,也少了客户端调用的代码,使用 Feign 实现负载均衡是首选方案。只需要你创建一个接口,然后在上面添加注解即可。
Feign 是声明式服务调用组件,其核心就是:像调用本地方法一样调用远程方法,无感知远程 HTTP 请求。
Feign vs OpenFeign
OpenFeign 是 Spring Cloud 在 Feign 的基础上支持了 Spring MVC 的注解,如 @RequesMapping、@Pathvariable 等等。
OpenFeign 的 @FeignClient 可以解析 SpringMVC 的 @RequestMapping 注解下的接口,并通过动态代理的方式产生实现类,实现类中做负载均衡并调用服务。
Feign 入门案例
feign-demo 聚合工程。SpringBoot 2.2.4.RELEASE、Spring Cloud Hoxton.SR1。
Feign 的使用主要分为以下几个步骤:
服务消费者添加 Feign 依赖;
创建业务层接口,添加 @FeignClient 注解声明需要调用的服务;
业务层抽象方法使用 SpringMVC 注解配置服务地址及参数;
启动类添加 @EnableFeignClients 注解激活 Feign 组件。
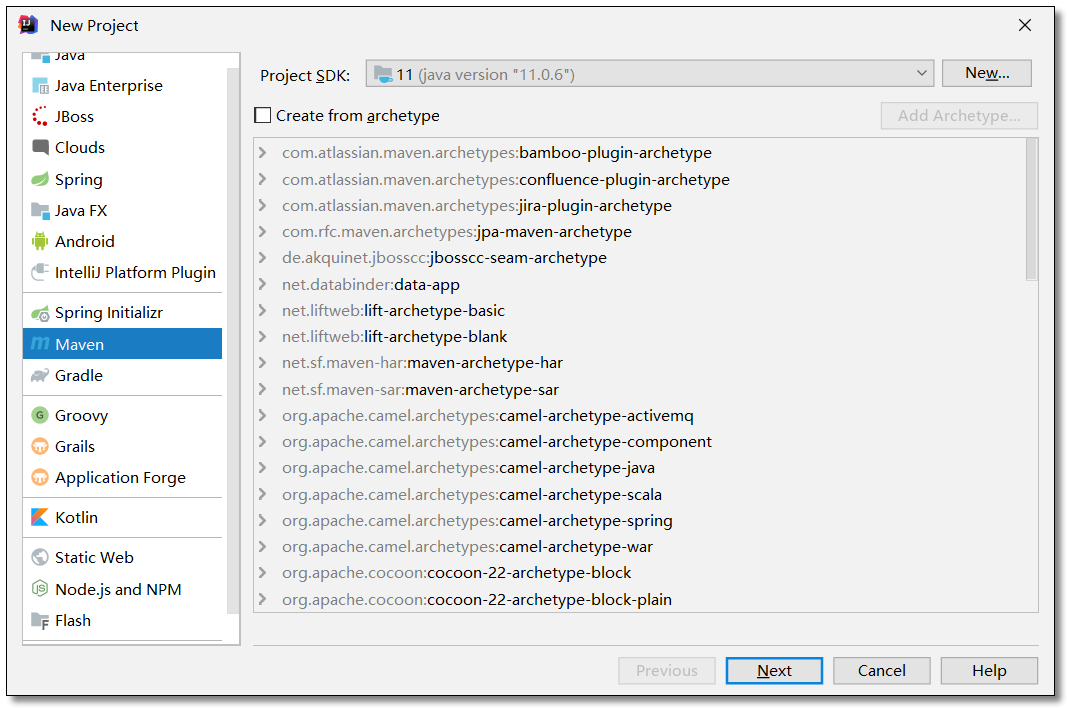
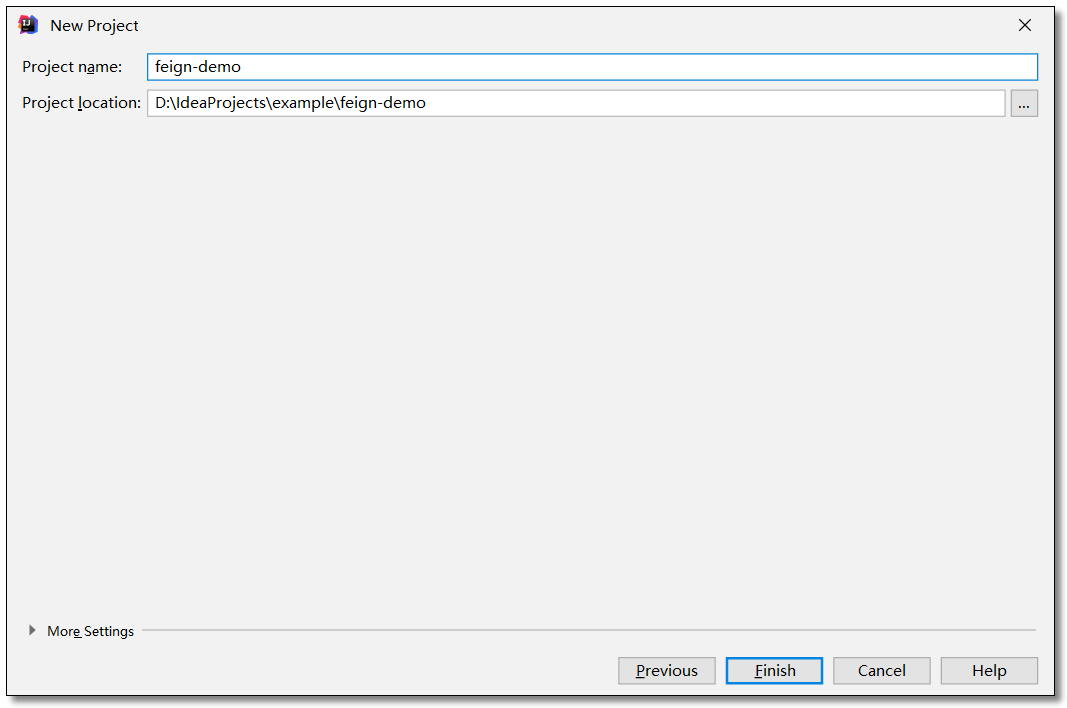
创建项目
PS:服务消费者通过 Eureka 注册中心获取服务,或者 Ribbon 点对点直连模式都可以使用 Feign 来实现。
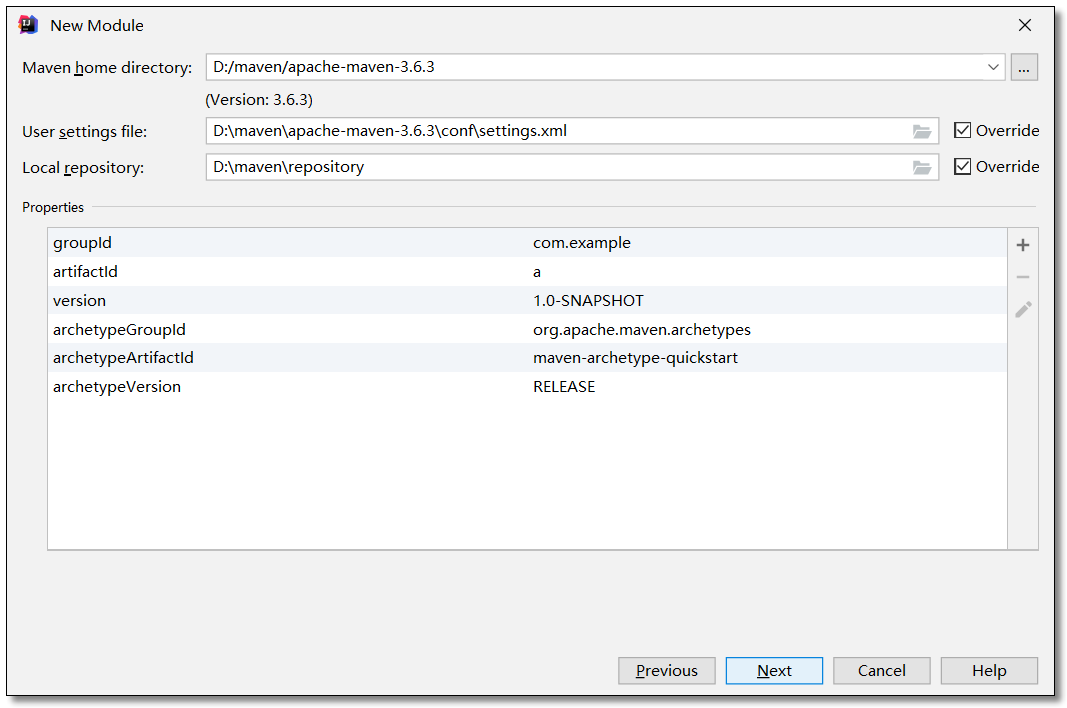
我们创建聚合项目并使用 Eureka 注册中心来讲解 Feign,首先创建一个 pom 父工程。
添加依赖
pom.xml
 1
 2
 3
 4
 5
 6
 7
 8
 9
10
11
12
13
14
15
16
17
18
19
20
21
22
23
24
25
26
27
28
29
30
31
32
33
34
35
36
37
38
39
40
41
42
43
<?xml version="1.0" encoding="UTF-8"?>
<project xmlns= "http://maven.apache.org/POM/4.0.0"
xmlns:xsi= "http://www.w3.org/2001/XMLSchema-instance"
xsi:schemaLocation= "http://maven.apache.org/POM/4.0.0 http://maven.apache.org/xsd/maven-4.0.0.xsd" >
<modelVersion> 4.0.0</modelVersion>
<groupId> com.example</groupId>
<artifactId> feign-demo</artifactId>
<version> 1.0-SNAPSHOT</version>
<!-- 继承 spring-boot-starter-parent 依赖 -->
<!-- 使用继承方式,实现复用,符合继承的都可以被使用 -->
<parent>
<groupId> org.springframework.boot</groupId>
<artifactId> spring-boot-starter-parent</artifactId>
<version> 2.2.4.RELEASE</version>
</parent>
<!--
集中定义依赖组件版本号,但不引入,
在子工程中用到声明的依赖时,可以不加依赖的版本号,
这样可以统一管理工程中用到的依赖版本
-->
<properties>
<!-- Spring Cloud Hoxton.SR1 依赖 -->
<spring-cloud.version> Hoxton.SR1</spring-cloud.version>
</properties>
<!-- 项目依赖管理 父项目只是声明依赖,子项目需要写明需要的依赖(可以省略版本信息) -->
<dependencyManagement>
<dependencies>
<!-- spring cloud 依赖 -->
<dependency>
<groupId> org.springframework.cloud</groupId>
<artifactId> spring-cloud-dependencies</artifactId>
<version> ${spring-cloud.version}</version>
<type> pom</type>
<scope> import</scope>
</dependency>
</dependencies>
</dependencyManagement>
</project>
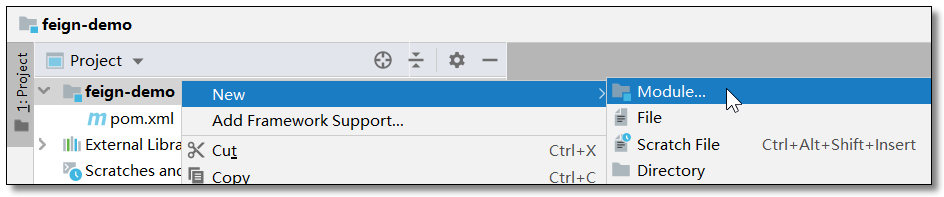
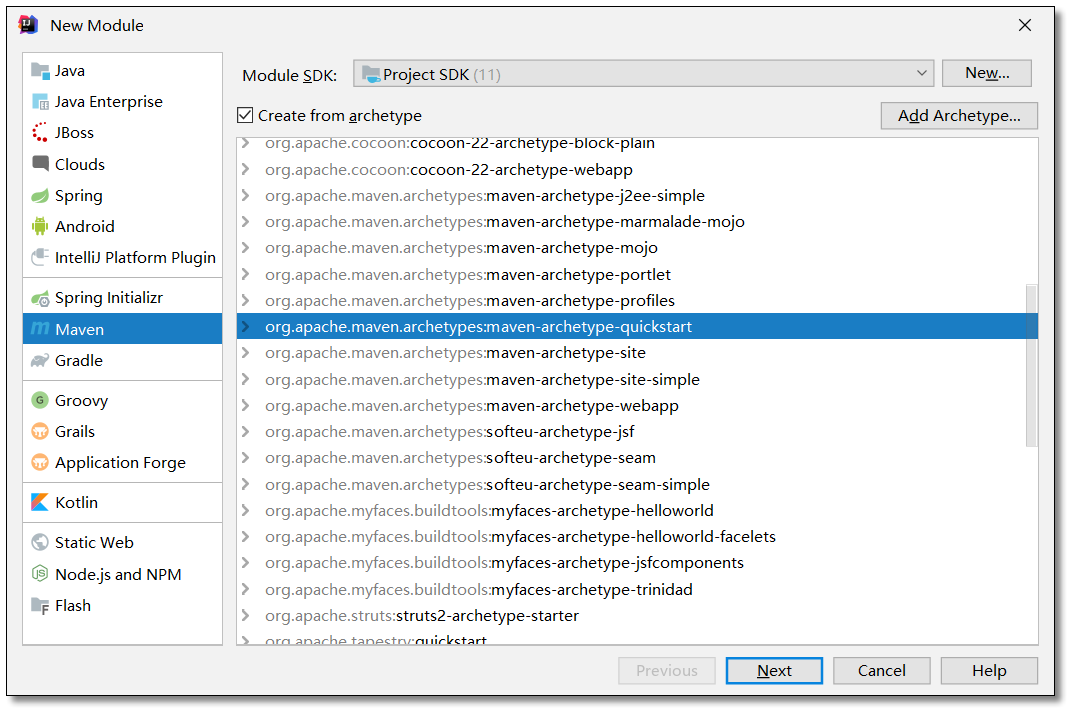
注册中心 eureka-server
注册中心我们采用集群方式构建,本文中使用两个节点分别是 eureka-server 和 eureka-server02。
创建项目
eureka-server 和 eureka-server02 的创建过程一致。
添加依赖
eureka-server 和 eureka-server02 的依赖配置一致。
pom.xml
 1
 2
 3
 4
 5
 6
 7
 8
 9
10
11
12
13
14
15
16
17
18
19
20
21
22
23
24
25
26
27
28
29
30
31
32
33
34
35
36
37
38
39
40
41
42
43
44
45
<?xml version="1.0" encoding="UTF-8"?>
<project xmlns= "http://maven.apache.org/POM/4.0.0" xmlns:xsi= "http://www.w3.org/2001/XMLSchema-instance"
xsi:schemaLocation= "http://maven.apache.org/POM/4.0.0 http://maven.apache.org/xsd/maven-4.0.0.xsd" >
<modelVersion> 4.0.0</modelVersion>
<groupId> com.example</groupId>
<artifactId> eureka-server</artifactId>
<version> 1.0-SNAPSHOT</version>
<!-- 继承父依赖 -->
<parent>
<groupId> com.example</groupId>
<artifactId> feign-demo</artifactId>
<version> 1.0-SNAPSHOT</version>
</parent>
<!-- 项目依赖 -->
<dependencies>
<!-- netflix eureka server 依赖 -->
<dependency>
<groupId> org.springframework.cloud</groupId>
<artifactId> spring-cloud-starter-netflix-eureka-server</artifactId>
</dependency>
<!-- spring boot web 依赖 -->
<dependency>
<groupId> org.springframework.boot</groupId>
<artifactId> spring-boot-starter-web</artifactId>
</dependency>
<!-- spring boot test 依赖 -->
<dependency>
<groupId> org.springframework.boot</groupId>
<artifactId> spring-boot-starter-test</artifactId>
<scope> test</scope>
<exclusions>
<exclusion>
<groupId> org.junit.vintage</groupId>
<artifactId> junit-vintage-engine</artifactId>
</exclusion>
</exclusions>
</dependency>
</dependencies>
</project>
配置文件
eureka-server 的 application.yml
 1
 2
 3
 4
 5
 6
 7
 8
 9
10
11
12
13
14
15
16
17
server :
port : 8761 # 端口
spring :
application :
name : eureka-server # 应用名称(集群下相同)
# 配置 Eureka Server 注册中心
eureka :
instance :
hostname : eureka01 # 主机名,不配置的时候将根据操作系统的主机名来获取
prefer-ip-address : true # 是否使用 ip 地址注册
instance-id : ${spring.cloud.client.ip-address}:${server.port} # ip:port
client :
# 设置服务注册中心地址,指向另一个注册中心
service-url : # 注册中心对外暴露的注册地址
defaultZone : http://localhost:8762/eureka/
eureka-server02 的 application.yml
 1
 2
 3
 4
 5
 6
 7
 8
 9
10
11
12
13
14
15
16
17
18
spring :
application :
name : eureka-server # 应用名称(集群下相同)
# 端口
server :
port : 8762
# 配置 Eureka Server 注册中心
eureka :
instance :
hostname : eureka02 # 主机名,不配置的时候将根据操作系统的主机名来获取
prefer-ip-address : true # 是否使用 ip 地址注册
instance-id : ${spring.cloud.client.ip-address}:${server.port} # ip:port
client :
# 设置服务注册中心地址,指向另一个注册中心
service-url : # 注册中心对外暴露的注册地址
defaultZone : http://localhost:8761/eureka/
启动类
eureka-server 和 eureka-server02 的启动类一致。
EurekaServerApplication.java
 1
 2
 3
 4
 5
 6
 7
 8
 9
10
11
12
13
14
15
16
package com.example ;
import org.springframework.boot.SpringApplication ;
import org.springframework.boot.autoconfigure.SpringBootApplication ;
import org.springframework.cloud.netflix.eureka.server.EnableEurekaServer ;
@SpringBootApplication
// 开启 EurekaServer 注解
@EnableEurekaServer
public class EurekaServerApplication {
public static void main ( String [] args ) {
SpringApplication . run ( EurekaServerApplication . class , args );
}
}
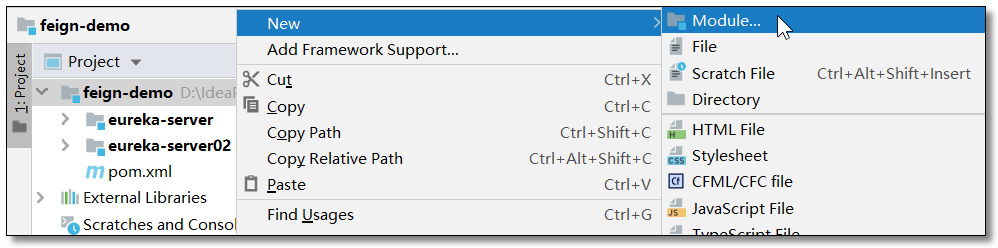
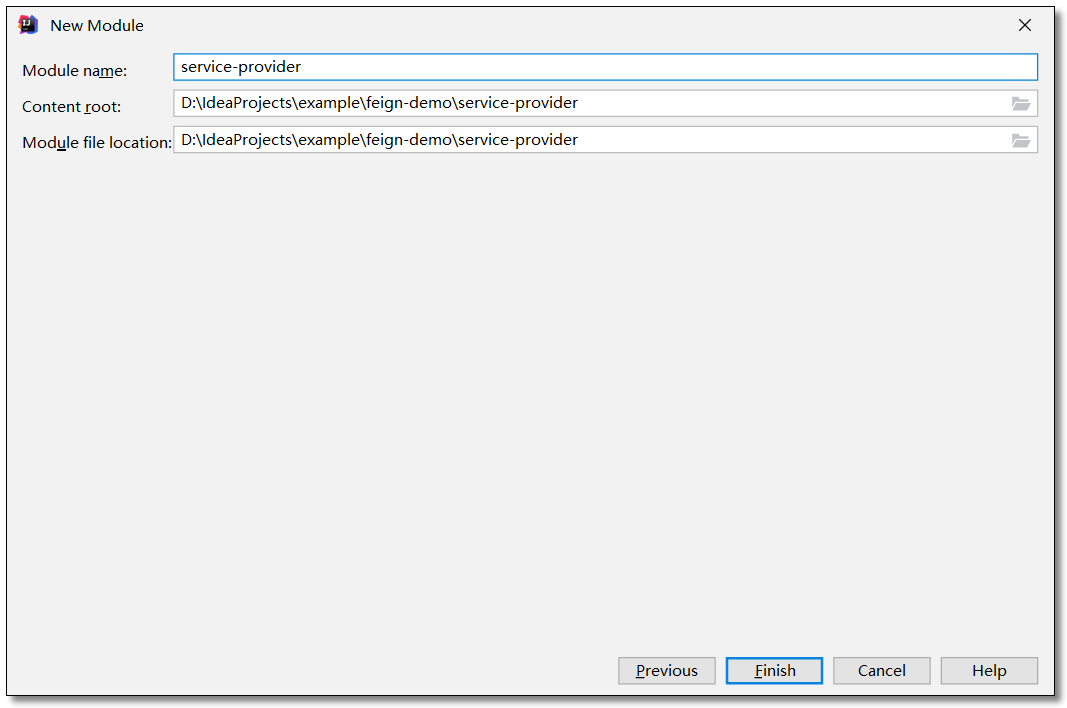
服务提供者 service-provider
服务提供者我们采用集群方式构建,本文中使用两个节点分别是 service-provider 和 service-provider02。
创建项目
service-provider 和 service-provider02 的创建过程一致。
添加依赖
service-provider 和 service-provider02 的依赖配置一致。
pom.xml
 1
 2
 3
 4
 5
 6
 7
 8
 9
10
11
12
13
14
15
16
17
18
19
20
21
22
23
24
25
26
27
28
29
30
31
32
33
34
35
36
37
38
39
40
41
42
43
44
45
46
47
48
49
50
51
<?xml version="1.0" encoding="UTF-8"?>
<project xmlns= "http://maven.apache.org/POM/4.0.0" xmlns:xsi= "http://www.w3.org/2001/XMLSchema-instance"
xsi:schemaLocation= "http://maven.apache.org/POM/4.0.0 http://maven.apache.org/xsd/maven-4.0.0.xsd" >
<modelVersion> 4.0.0</modelVersion>
<groupId> com.example</groupId>
<artifactId> service-provider</artifactId>
<version> 1.0-SNAPSHOT</version>
<!-- 继承父依赖 -->
<parent>
<groupId> com.example</groupId>
<artifactId> feign-demo</artifactId>
<version> 1.0-SNAPSHOT</version>
</parent>
<!-- 项目依赖 -->
<dependencies>
<!-- netflix eureka client 依赖 -->
<dependency>
<groupId> org.springframework.cloud</groupId>
<artifactId> spring-cloud-starter-netflix-eureka-client</artifactId>
</dependency>
<!-- spring boot web 依赖 -->
<dependency>
<groupId> org.springframework.boot</groupId>
<artifactId> spring-boot-starter-web</artifactId>
</dependency>
<!-- lombok 依赖 -->
<dependency>
<groupId> org.projectlombok</groupId>
<artifactId> lombok</artifactId>
<scope> provided</scope>
</dependency>
<!-- spring boot test 依赖 -->
<dependency>
<groupId> org.springframework.boot</groupId>
<artifactId> spring-boot-starter-test</artifactId>
<scope> test</scope>
<exclusions>
<exclusion>
<groupId> org.junit.vintage</groupId>
<artifactId> junit-vintage-engine</artifactId>
</exclusion>
</exclusions>
</dependency>
</dependencies>
</project>
配置文件
service-provider 的 application.yml
 1
 2
 3
 4
 5
 6
 7
 8
 9
10
11
12
13
14
15
server :
port : 7070 # 端口
spring :
application :
name : service-provider # 应用名称(集群下相同)
# 配置 Eureka Server 注册中心
eureka :
instance :
prefer-ip-address : true # 是否使用 ip 地址注册
instance-id : ${spring.cloud.client.ip-address}:${server.port} # ip:port
client :
service-url : # 设置服务注册中心地址
defaultZone : http://localhost:8761/eureka/,http://localhost:8762/eureka/
service-provider02 的 application.yml
 1
 2
 3
 4
 5
 6
 7
 8
 9
10
11
12
13
14
15
16
spring :
application :
name : service-provider # 应用名称(集群下相同)
# 端口
server :
port : 7071
# 配置 Eureka Server 注册中心
eureka :
instance :
prefer-ip-address : true # 是否使用 ip 地址注册
instance-id : ${spring.cloud.client.ip-address}:${server.port} # ip:port
client :
service-url : # 设置服务注册中心地址
defaultZone : http://localhost:8761/eureka/,http://localhost:8762/eureka/
实体类
service-provider 和 service-provider02 的实体类一致。
Product.java
 1
 2
 3
 4
 5
 6
 7
 8
 9
10
11
12
13
14
15
16
17
18
19
package com.example.pojo ;
import lombok.AllArgsConstructor ;
import lombok.Data ;
import lombok.NoArgsConstructor ;
import java.io.Serializable ;
@Data
@NoArgsConstructor
@AllArgsConstructor
public class Product implements Serializable {
private Integer id ;
private String productName ;
private Integer productNum ;
private Double productPrice ;
}
编写服务
service-provider 和 service-provider02 的服务代码一致。
ProductService.java
 1
 2
 3
 4
 5
 6
 7
 8
 9
10
11
12
13
14
15
16
17
18
19
package com.example.service ;
import com.example.pojo.Product ;
import java.util.List ;
/**
* 商品服务
*/
public interface ProductService {
/**
* 查询商品列表
*
* @return
*/
List < Product > selectProductList ();
}
ProductServiceImpl.java
 1
 2
 3
 4
 5
 6
 7
 8
 9
10
11
12
13
14
15
16
17
18
19
20
21
22
23
24
25
26
27
28
29
30
package com.example.service.impl ;
import com.example.pojo.Product ;
import com.example.service.ProductService ;
import org.springframework.stereotype.Service ;
import java.util.Arrays ;
import java.util.List ;
/**
* 商品服务
*/
@Service
public class ProductServiceImpl implements ProductService {
/**
* 查询商品列表
*
* @return
*/
@Override
public List < Product > selectProductList () {
return Arrays . asList (
new Product ( 1 , "华为手机" , 1 , 5800D ),
new Product ( 2 , "联想笔记本" , 1 , 6888D ),
new Product ( 3 , "小米平板" , 5 , 2020D )
);
}
}
控制层
service-provider 和 service-provider02 的控制层一致。
ProductController.java
 1
 2
 3
 4
 5
 6
 7
 8
 9
10
11
12
13
14
15
16
17
18
19
20
21
22
23
24
25
26
27
28
29
package com.example.controller ;
import com.example.pojo.Product ;
import com.example.service.ProductService ;
import org.springframework.beans.factory.annotation.Autowired ;
import org.springframework.web.bind.annotation.GetMapping ;
import org.springframework.web.bind.annotation.RequestMapping ;
import org.springframework.web.bind.annotation.RestController ;
import java.util.List ;
@RestController
@RequestMapping ( "/product" )
public class ProductController {
@Autowired
private ProductService productService ;
/**
* 查询商品列表
*
* @return
*/
@GetMapping ( "/list" )
public List < Product > selectProductList () {
return productService . selectProductList ();
}
}
启动类
service-provider 和 service-provider02 的启动类一致。
ServiceProviderApplication.java
 1
 2
 3
 4
 5
 6
 7
 8
 9
10
11
12
13
14
15
package com.example ;
import org.springframework.boot.SpringApplication ;
import org.springframework.boot.autoconfigure.SpringBootApplication ;
@SpringBootApplication
// 开启 EurekaClient 注解,目前版本如果配置了 Eureka 注册中心,默认会开启该注解
//@EnableEurekaClient
public class ServiceProviderApplication {
public static void main ( String [] args ) {
SpringApplication . run ( ServiceProviderApplication . class , args );
}
}
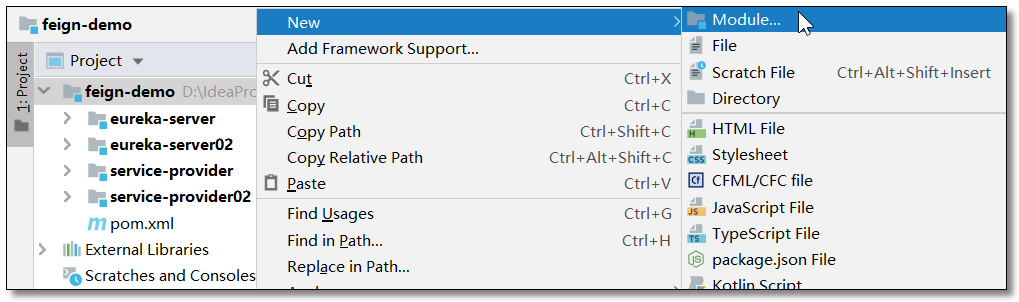
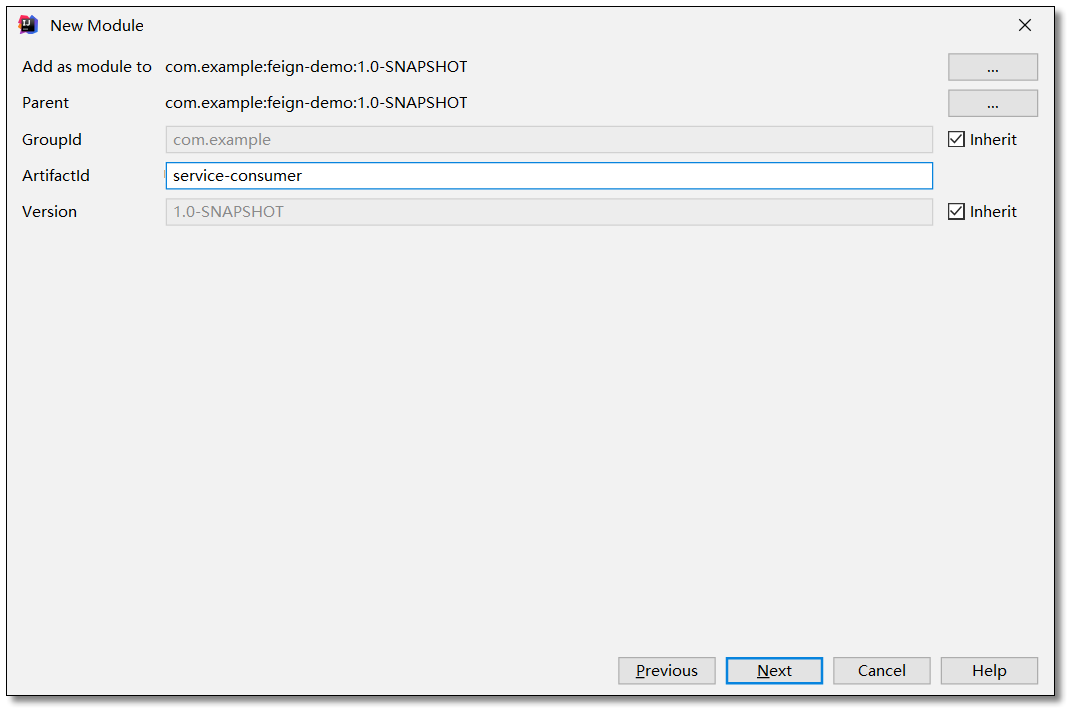
服务消费者 service-consumer
创建项目
在刚才的父工程下创建一个 service-consumer 服务消费者的项目。
添加依赖
服务消费者添加 openfeign 依赖。
pom.xml
 1
 2
 3
 4
 5
 6
 7
 8
 9
10
11
12
13
14
15
16
17
18
19
20
21
22
23
24
25
26
27
28
29
30
31
32
33
34
35
36
37
38
39
40
41
42
43
44
45
46
47
48
49
50
51
52
53
54
55
56
<?xml version="1.0" encoding="UTF-8"?>
<project xmlns= "http://maven.apache.org/POM/4.0.0" xmlns:xsi= "http://www.w3.org/2001/XMLSchema-instance"
xsi:schemaLocation= "http://maven.apache.org/POM/4.0.0 http://maven.apache.org/xsd/maven-4.0.0.xsd" >
<modelVersion> 4.0.0</modelVersion>
<groupId> com.example</groupId>
<artifactId> service-consumer</artifactId>
<version> 1.0-SNAPSHOT</version>
<!-- 继承父依赖 -->
<parent>
<groupId> com.example</groupId>
<artifactId> feign-demo</artifactId>
<version> 1.0-SNAPSHOT</version>
</parent>
<!-- 项目依赖 -->
<dependencies>
<!-- netflix eureka client 依赖 -->
<dependency>
<groupId> org.springframework.cloud</groupId>
<artifactId> spring-cloud-starter-netflix-eureka-client</artifactId>
</dependency>
<!-- spring cloud openfeign 依赖 -->
<dependency>
<groupId> org.springframework.cloud</groupId>
<artifactId> spring-cloud-starter-openfeign</artifactId>
</dependency>
<!-- spring boot web 依赖 -->
<dependency>
<groupId> org.springframework.boot</groupId>
<artifactId> spring-boot-starter-web</artifactId>
</dependency>
<!-- lombok 依赖 -->
<dependency>
<groupId> org.projectlombok</groupId>
<artifactId> lombok</artifactId>
<scope> provided</scope>
</dependency>
<!-- spring boot test 依赖 -->
<dependency>
<groupId> org.springframework.boot</groupId>
<artifactId> spring-boot-starter-test</artifactId>
<scope> test</scope>
<exclusions>
<exclusion>
<groupId> org.junit.vintage</groupId>
<artifactId> junit-vintage-engine</artifactId>
</exclusion>
</exclusions>
</dependency>
</dependencies>
</project>
配置文件
application.yml
 1
 2
 3
 4
 5
 6
 7
 8
 9
10
11
12
13
14
server :
port : 9090 # 端口
spring :
application :
name : service-consumer # 应用名称
# 配置 Eureka Server 注册中心
eureka :
client :
register-with-eureka : false # 是否将自己注册到注册中心,默认为 true
registry-fetch-interval-seconds : 10 # 表示 Eureka Client 间隔多久去服务器拉取注册信息,默认为 30 秒
service-url : # 设置服务注册中心地址
defaultZone : http://localhost:8761/eureka/,http://localhost:8762/eureka/
实体类
Product.java
 1
 2
 3
 4
 5
 6
 7
 8
 9
10
11
12
13
14
15
16
17
18
19
package com.example.pojo ;
import lombok.AllArgsConstructor ;
import lombok.Data ;
import lombok.NoArgsConstructor ;
import java.io.Serializable ;
@Data
@NoArgsConstructor
@AllArgsConstructor
public class Product implements Serializable {
private Integer id ;
private String productName ;
private Integer productNum ;
private Double productPrice ;
}
Order.java
 1
 2
 3
 4
 5
 6
 7
 8
 9
10
11
12
13
14
15
16
17
18
19
20
21
package com.example.pojo ;
import lombok.AllArgsConstructor ;
import lombok.Data ;
import lombok.NoArgsConstructor ;
import java.io.Serializable ;
import java.util.List ;
@Data
@NoArgsConstructor
@AllArgsConstructor
public class Order implements Serializable {
private Integer id ;
private String orderNo ;
private String orderAddress ;
private Double totalPrice ;
private List < Product > productList ;
}
消费服务
ProductService.java
 1
 2
 3
 4
 5
 6
 7
 8
 9
10
11
12
13
14
15
16
17
18
19
20
21
22
package com.example.service ;
import com.example.pojo.Product ;
import org.springframework.cloud.openfeign.FeignClient ;
import org.springframework.web.bind.annotation.GetMapping ;
import java.util.List ;
// 声明需要调用的服务
@FeignClient ( "service-provider" )
public interface ProductService {
/**
* 查询商品列表
*
* @return
*/
// 配置需要调用的服务地址及参数
@GetMapping ( "/product/list" )
List < Product > selectProductList ();
}
OrderService.java
 1
 2
 3
 4
 5
 6
 7
 8
 9
10
11
12
13
14
15
package com.example.service ;
import com.example.pojo.Order ;
public interface OrderService {
/**
* 根据主键查询订单
*
* @param id
* @return
*/
Order selectOrderById ( Integer id );
}
OrderServiceImpl.java
 1
 2
 3
 4
 5
 6
 7
 8
 9
10
11
12
13
14
15
16
17
18
19
20
21
22
23
24
25
26
27
package com.example.service.impl ;
import com.example.pojo.Order ;
import com.example.service.OrderService ;
import com.example.service.ProductService ;
import org.springframework.beans.factory.annotation.Autowired ;
import org.springframework.stereotype.Service ;
@Service
public class OrderServiceImpl implements OrderService {
@Autowired
private ProductService productService ;
/**
* 根据主键查询订单
*
* @param id
* @return
*/
@Override
public Order selectOrderById ( Integer id ) {
return new Order ( id , "order-001" , "中国" , 22788D ,
productService . selectProductList ());
}
}
控制层
OrderController.java
 1
 2
 3
 4
 5
 6
 7
 8
 9
10
11
12
13
14
15
16
17
18
19
20
21
22
23
24
25
26
27
28
29
package com.example.controller ;
import com.example.pojo.Order ;
import com.example.service.OrderService ;
import org.springframework.beans.factory.annotation.Autowired ;
import org.springframework.web.bind.annotation.GetMapping ;
import org.springframework.web.bind.annotation.PathVariable ;
import org.springframework.web.bind.annotation.RequestMapping ;
import org.springframework.web.bind.annotation.RestController ;
@RestController
@RequestMapping ( "/order" )
public class OrderController {
@Autowired
private OrderService orderService ;
/**
* 根据主键查询订单
*
* @param id
* @return
*/
@GetMapping ( "/{id}" )
public Order selectOrderById ( @PathVariable ( "id" ) Integer id ) {
return orderService . selectOrderById ( id );
}
}
启动类
ServiceConsumerApplication.java
 1
 2
 3
 4
 5
 6
 7
 8
 9
10
11
12
13
14
15
16
17
18
package com.example ;
import org.springframework.boot.SpringApplication ;
import org.springframework.boot.autoconfigure.SpringBootApplication ;
import org.springframework.cloud.openfeign.EnableFeignClients ;
@SpringBootApplication
// 开启 EurekaClient 注解,目前版本如果配置了 Eureka 注册中心,默认会开启该注解
//@EnableEurekaClient
// 开启 FeignClients 注解
@EnableFeignClients
public class ServiceConsumerApplication {
public static void main ( String [] args ) {
SpringApplication . run ( ServiceConsumerApplication . class , args );
}
}
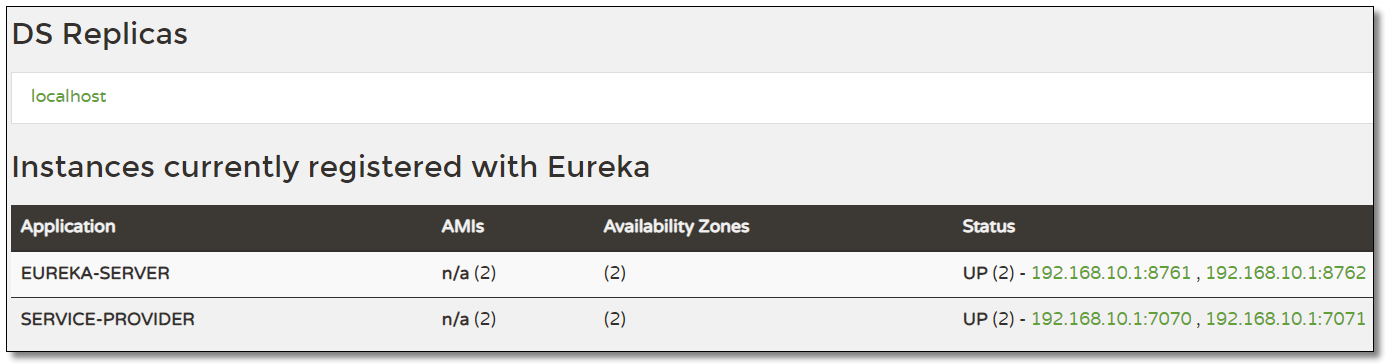
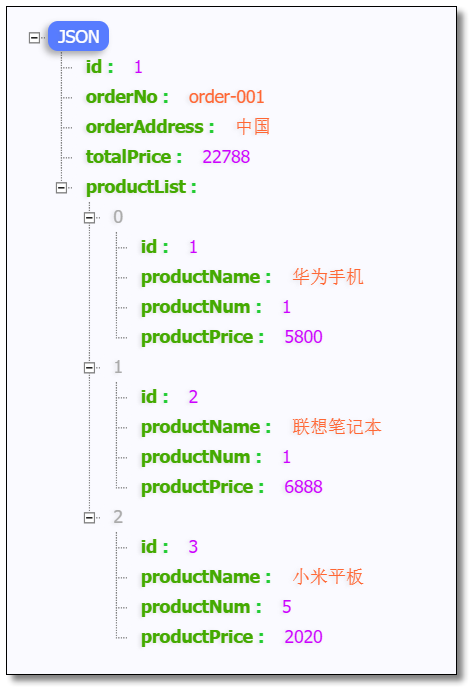
访问
当前环境运行结果如下:
访问:http://localhost:9090/order/1
Feign 负载均衡
Feign 封装了 Ribbon 自然也就集成了负载均衡的功能,默认采用轮询策略。如何修改负载均衡策略呢?与之前学习 Ribbon 时讲解的配置是一致的。
全局
在启动类或配置类中注入负载均衡策略对象。所有服务请求均使用该策略。
1
2
3
4
@Bean
public RandomRule randomRule () {
return new RandomRule ();
}
局部
修改配置文件指定服务的负载均衡策略。格式:服务应用名.ribbon.NFLoadBalancerRuleClassName
1
2
3
4
5
# 负载均衡策略
# service-provider 为调用的服务的名称
service-provider :
ribbon :
NFLoadBalancerRuleClassName : com.netflix.loadbalancer.RandomRule
Feign 请求传参
GET
使用 @PathVariable 注解或 @RequestParam 注解接收请求参数。
服务提供者
ProductService.java
1
2
3
4
5
6
7
/**
* 根据主键查询商品
*
* @param id
* @return
*/
Product selectProductById ( Integer id );
ProductServiceImpl.java
 1
 2
 3
 4
 5
 6
 7
 8
 9
10
/**
* 根据主键查询商品
*
* @param id
* @return
*/
@Override
public Product selectProductById ( Integer id ) {
return new Product ( id , "冰箱" , 1 , 2666D );
}
ProductController.java
 1
 2
 3
 4
 5
 6
 7
 8
 9
10
11
12
13
14
15
16
17
18
19
20
21
22
23
24
25
26
27
28
29
30
31
package com.example.controller ;
import com.example.pojo.Product ;
import com.example.service.ProductService ;
import org.springframework.beans.factory.annotation.Autowired ;
import org.springframework.web.bind.annotation.GetMapping ;
import org.springframework.web.bind.annotation.PathVariable ;
import org.springframework.web.bind.annotation.RequestMapping ;
import org.springframework.web.bind.annotation.RestController ;
import java.util.List ;
@RestController
@RequestMapping ( "/product" )
public class ProductController {
@Autowired
private ProductService productService ;
/**
* 根据主键查询商品
*
* @param id
* @return
*/
@GetMapping ( "/{id}" )
public Product selectProductById ( @PathVariable ( "id" ) Integer id ) {
return productService . selectProductById ( id );
}
}
服务消费者
ProductService.java
 1
 2
 3
 4
 5
 6
 7
 8
 9
10
11
12
13
14
15
16
17
18
19
20
21
22
package com.example.service ;
import com.example.pojo.Product ;
import org.springframework.cloud.openfeign.FeignClient ;
import org.springframework.web.bind.annotation.GetMapping ;
import org.springframework.web.bind.annotation.PathVariable ;
import java.util.List ;
// 声明需要调用的服务
@FeignClient ( "service-provider" )
public interface ProductService {
/**
* 根据主键查询商品
*
* @return
*/
@GetMapping ( "/product/{id}" )
Product selectProductById ( @PathVariable ( "id" ) Integer id );
}
OrderServiceImpl.java
 1
 2
 3
 4
 5
 6
 7
 8
 9
10
11
12
13
14
15
16
17
18
19
20
21
22
23
24
25
26
27
28
29
package com.example.service.impl ;
import com.example.pojo.Order ;
import com.example.service.OrderService ;
import com.example.service.ProductService ;
import org.springframework.beans.factory.annotation.Autowired ;
import org.springframework.stereotype.Service ;
import java.util.Arrays ;
@Service
public class OrderServiceImpl implements OrderService {
@Autowired
private ProductService productService ;
/**
* 根据主键查询订单
*
* @param id
* @return
*/
@Override
public Order selectOrderById ( Integer id ) {
return new Order ( id , "order-003" , "中国" , 2666D ,
Arrays . asList ( productService . selectProductById ( 5 )));
}
}
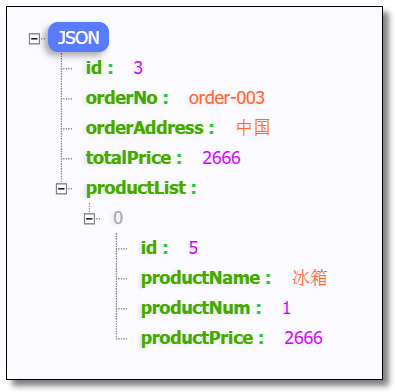
访问
访问:http://localhost:9090/order/3 结果如下:
POST
使用 @RequestBody 注解接收请求参数。
服务提供者
ProductService.java
 1
 2
 3
 4
 5
 6
 7
 8
 9
10
11
12
13
14
15
/**
* 根据主键查询商品
*
* @param id
* @return
*/
Product queryProductById ( Integer id );
/**
* 新增商品
*
* @param product
* @return
*/
Map < Object , Object > createProduct ( Product product );
ProductServiceImpl.java
 1
 2
 3
 4
 5
 6
 7
 8
 9
10
11
12
13
14
15
16
17
18
19
20
21
22
23
24
25
/**
* 根据主键查询商品
*
* @param id
* @return
*/
@Override
public Product queryProductById ( Integer id ) {
return new Product ( id , "冰箱" , 1 , 2666D );
}
/**
* 新增商品
*
* @param product
* @return
*/
@Override
public Map < Object , Object > createProduct ( Product product ) {
System . out . println ( product );
return new HashMap < Object , Object > () {{
put ( "code" , 200 );
put ( "message" , "新增成功" );
}};
}
ProductController.java
 1
 2
 3
 4
 5
 6
 7
 8
 9
10
11
12
13
14
15
16
17
18
19
20
21
22
23
24
25
26
27
28
29
30
31
32
33
34
35
36
37
38
39
40
package com.example.controller ;
import com.example.pojo.Product ;
import com.example.service.ProductService ;
import org.springframework.beans.factory.annotation.Autowired ;
import org.springframework.web.bind.annotation.* ;
import java.util.List ;
import java.util.Map ;
@RestController
@RequestMapping ( "/product" )
public class ProductController {
@Autowired
private ProductService productService ;
/**
* 根据主键查询商品
*
* @param id
* @return
*/
@PostMapping ( "/single" )
public Product queryProductById ( @RequestBody Integer id ) {
return productService . queryProductById ( id );
}
/**
* 新增商品
*
* @param product
* @return
*/
@PostMapping ( "/save" )
public Map < Object , Object > createProduct ( @RequestBody Product product ) {
return productService . createProduct ( product );
}
}
服务消费者
ProductService.java
 1
 2
 3
 4
 5
 6
 7
 8
 9
10
11
12
13
14
15
16
17
18
19
20
21
22
23
24
25
26
27
28
29
30
31
32
33
34
package com.example.service ;
import com.example.pojo.Product ;
import org.springframework.cloud.openfeign.FeignClient ;
import org.springframework.web.bind.annotation.GetMapping ;
import org.springframework.web.bind.annotation.PathVariable ;
import org.springframework.web.bind.annotation.PostMapping ;
import java.util.List ;
import java.util.Map ;
// 声明需要调用的服务
@FeignClient ( "service-provider" )
public interface ProductService {
/**
* 根据主键查询商品
*
* @param id
* @return
*/
@PostMapping ( "/product/single" )
Product queryProductById ( Integer id );
/**
* 新增商品
*
* @param product
* @return
*/
@PostMapping ( "/product/save" )
Map < Object , Object > createProduct ( Product product );
}
为了方便测试,直接创建入口调用,不通过订单服务去调用商品服务了。
ProductController.java
 1
 2
 3
 4
 5
 6
 7
 8
 9
10
11
12
13
14
15
16
17
18
19
20
21
22
23
24
25
26
27
28
29
30
31
32
33
34
35
36
37
38
39
40
41
package com.example.controller ;
import com.example.pojo.Product ;
import com.example.service.ProductService ;
import org.springframework.beans.factory.annotation.Autowired ;
import org.springframework.web.bind.annotation.PostMapping ;
import org.springframework.web.bind.annotation.RequestMapping ;
import org.springframework.web.bind.annotation.RestController ;
import java.util.Map ;
@RestController
@RequestMapping ( "/product" )
public class ProductController {
@Autowired
private ProductService productService ;
/**
* 根据主键查询商品
*
* @param id
* @return
*/
@PostMapping ( "/info" )
public Product queryProductById ( Integer id ) {
return productService . queryProductById ( id );
}
/**
* 新增商品
*
* @param product
* @return
*/
@PostMapping ( "/save" )
public Map < Object , Object > createProduct ( Product product ) {
return productService . createProduct ( product );
}
}
访问
访问:http://localhost:9090/product/info 请求参数为 id=5 结果如下:
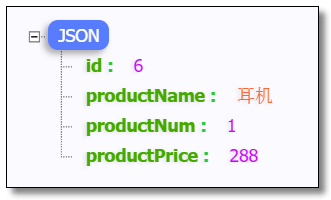
访问:http://localhost:9090/product/save 请求参数为 id=6&productName=耳机&productNum=1&productPrice=288 结果如下:
Feign 性能优化
Gzip 压缩
gzip 介绍:gzip 是一种数据格式 ,采用 deflate 算法压缩数据;gzip 是一种流行的文件压缩算法,应用十分广泛,尤其是在 Linux 平台。
gzip 能力:当 Gzip 压缩一个纯文本文件 时,效果是非常明显的,大约可以减少 70% 以上的文件大小。
gzip 作用:网络数据经过压缩后实际上降低了网络传输的字节数 ,最明显的好处就是可以加快网页加载的速度 。网页加载速度加快的好处不言而喻,除了节省流量,改善用户的浏览体验外,另一个潜在的好处是 Gzip 与搜索引擎的抓取工具有着更好的关系。例如 Google 就可以通过直接读取 gzip 文件来比普通手工抓取更快地检索网页。
HTTP 协议关于压缩传输的规定
客户端向服务器请求中带有:Accept-Encoding:gzip,deflate 字段,向服务器表示客户端支持的压缩格式(gzip 或者 deflate),如果不发送该消息头,服务端默认是不会压缩的。
服务端在收到请求之后,如果发现请求头中含有 Accept-Encoding 字段,并且支持该类型压缩,就会对响应报文压缩之后返回给客户端,并且携带 Content-Encoding:gzip 消息头,表示响应报文是根据该格式进行压缩的。
客户端接收到请求之后,先判断是否有 Content-Encoding 消息头,如果有,按该格式解压报文。否则按正常报文处理。
Gzip 压缩案例
局部
只配置 Consumer 通过 Feign 到 Provider 的请求与相应的 Gzip 压缩。
服务消费者 application.yml
1
2
3
4
5
6
7
8
9
# Feign gzip 压缩
feign :
compression :
request :
mime-types : text/xml,application/xml,application/json # 配置压缩支持的 MIME TYPE
min-request-size : 512 # 配置压缩数据大小的最小阈值,默认 2048
enabled : true # 请求是否开启 gzip 压缩
response :
enabled : true # 响应是否开启 gzip 压缩
全局
对客户端浏览器的请求以及 Consumer 对 Provider 的请求与响应都实现 Gzip 压缩。
服务消费者 application.yml
1
2
3
4
5
6
7
server :
port : 9090 # 端口
compression :
# 是否开启压缩
enabled : true
# 配置压缩支持的 MIME TYPE
mime-types : application/json,application/xml,text/html,text/xml,text/plain
测试
访问:http://localhost:9090/order/1 结果如下:
HTTP 连接池
为什么 HTTP 连接池能提升性能?
HTTP 的背景原理
两台服务器建立 HTTP 连接的过程是很复杂的一个过程,涉及到多个数据包的交换,很耗时间。
HTTP 连接需要的 3 次握手 4 次挥手开销很大,这一开销对于大量的比较小的 HTTP 消息来说更大。
解决方案
采用 HTTP 连接池 ,可以节约大量的 3 次握手 4 次挥手,这样能大大提升吞吐量。
Feign 的 HTTP 客户端支持 3 种框架:HttpURLConnection、HttpClient、OkHttp;默认是 HttpURLConnection。可以通过查看源码 org.springframework.cloud.openfeign.ribbon.FeignRibbonClientAutoConfiguration.java 得知。
传统的 HttpURLConnection 是 JDK 自带的,并不支持连接池,如果要实现连接池的机制,还需要自己来管理连接对象。对于网络请求这种底层相对复杂的操作,如果有可用的其他方案,没有必要自己去管理连接对象。
HttpClient 相比传统 JDK 自带的 HttpURLConnection,它封装了访问 HTTP 的请求头,参数,内容体,响应等等;它不仅使客户端发送 HTTP 请求变得容易,而且也方便了开发人员测试接口(基于 HTTP 协议的),既提高了开发的效率,又提高了代码的健壮性;另外高并发大量的请求网络的时候,也是用“连接池”提升吞吐量。
HttpClient
将 Feign 的 Http 客户端工具修改为 HttpClient。
添加依赖
修改 Consumer 项目,添加两个依赖,因为本文中使用的 Spring CLoud 版本已经默认集成了 apache httpclient 依赖,所以只需要添加一个依赖即可。
 1
 2
 3
 4
 5
 6
 7
 8
 9
10
11
12
<!-- 当前版本已经默认集成了 apache httpclient 依赖 -->
<dependency>
<groupId> org.apache.httpcomponents</groupId>
<artifactId> httpclient</artifactId>
<version> 4.5.11</version>
</dependency>
<!-- feign apache httpclient 依赖 -->
<dependency>
<groupId> io.github.openfeign</groupId>
<artifactId> feign-httpclient</artifactId>
<version> 10.7.4</version>
</dependency>
配置文件
1
2
3
feign :
httpclient :
enabled : true # 开启 httpclient
PS:如果使用 HttpClient 作为 Feign 的客户端工具。那么在定义接口上的注解是需要注意的,如果传递的参数是一个自定义的对象(对象会使用 JSON 格式来专递),需要配置参数类型,例如:@GetMapping(value = "/single/pojo", consumes = MediaType.APPLICATION_JSON_VALUE)。**本文中使用的 Spring CLoud 版本,已无需手动配置。**并且使用了 HttpClient 客户端以后,我们还可以通过 GET 请求传递对象参数。
服务提供者
我们主要演示如何通过 GET 请求传递对象参数,POST 请求的方式代码无需任何改变。
ProductService.java
1
2
3
4
5
6
7
/**
* 接收商品对象参数
*
* @param product
* @return
*/
Product selectProductByPojo ( Product product );
ProductServiceImpl.java
 1
 2
 3
 4
 5
 6
 7
 8
 9
10
/**
* 接收商品对象参数
*
* @param product
* @return
*/
public Product selectProductByPojo ( Product product ) {
System . out . println ( product );
return product ;
}
ProductController.java
 1
 2
 3
 4
 5
 6
 7
 8
 9
10
11
12
13
14
15
16
17
18
19
20
21
22
23
24
25
26
27
28
29
package com.example.controller ;
import com.example.pojo.Product ;
import com.example.service.ProductService ;
import org.springframework.beans.factory.annotation.Autowired ;
import org.springframework.web.bind.annotation.* ;
import java.util.List ;
import java.util.Map ;
@RestController
@RequestMapping ( "/product" )
public class ProductController {
@Autowired
private ProductService productService ;
/**
* 接收商品对象参数
*
* @param product
* @return
*/
@GetMapping ( "/pojo" )
public Product selectUserByPojo ( @RequestBody Product product ) {
return productService . selectProductByPojo ( product );
}
}
服务消费者
ProductService.java
 1
 2
 3
 4
 5
 6
 7
 8
 9
10
11
12
13
14
15
16
17
18
19
20
package com.example.service ;
import com.example.pojo.Product ;
import org.springframework.cloud.openfeign.FeignClient ;
import org.springframework.web.bind.annotation.GetMapping ;
// 声明需要调用的服务
@FeignClient ( "service-provider" )
public interface ProductService {
/**
* 接收商品对象参数
*
* @param product
* @return
*/
@GetMapping ( "/product/pojo" )
Product selectProductByPojo ( Product product );
}
ProductController.java
 1
 2
 3
 4
 5
 6
 7
 8
 9
10
11
12
13
14
15
16
17
18
19
20
21
22
23
24
25
26
27
28
29
30
31
package com.example.controller ;
import com.example.pojo.Product ;
import com.example.service.ProductService ;
import org.springframework.beans.factory.annotation.Autowired ;
import org.springframework.web.bind.annotation.GetMapping ;
import org.springframework.web.bind.annotation.PostMapping ;
import org.springframework.web.bind.annotation.RequestMapping ;
import org.springframework.web.bind.annotation.RestController ;
import java.util.Map ;
@RestController
@RequestMapping ( "/product" )
public class ProductController {
@Autowired
private ProductService productService ;
/**
* 接收商品对象参数
*
* @param product
* @return
*/
@GetMapping ( "/pojo" )
public Product selectUserByPojo ( Product product ) {
return productService . selectProductByPojo ( product );
}
}
测试
访问:http://localhost:9090/product/pojo?id=6&productName=耳机&productNum=1&productPrice=288 结果如下:
状态查看
浏览器发起的请求我们可以借助 F12 Devtools 中的 Network 来查看请求和响应信息。对于微服务中每个接口我们又该如何查看 URL,状态码和耗时信息?我们可以使用配置日志的方式进行查看。
logback.xml
Consumer 项目添加 logback.xml 日志文件,内容如下(logback 日志的输出级别需要是 DEBUG 级别):
  1
  2
  3
  4
  5
  6
  7
  8
  9
 10
 11
 12
 13
 14
 15
 16
 17
 18
 19
 20
 21
 22
 23
 24
 25
 26
 27
 28
 29
 30
 31
 32
 33
 34
 35
 36
 37
 38
 39
 40
 41
 42
 43
 44
 45
 46
 47
 48
 49
 50
 51
 52
 53
 54
 55
 56
 57
 58
 59
 60
 61
 62
 63
 64
 65
 66
 67
 68
 69
 70
 71
 72
 73
 74
 75
 76
 77
 78
 79
 80
 81
 82
 83
 84
 85
 86
 87
 88
 89
 90
 91
 92
 93
 94
 95
 96
 97
 98
 99
100
101
102
103
104
105
106
107
108
109
110
111
112
113
114
115
116
117
118
119
120
121
122
123
124
125
126
127
128
129
130
131
132
133
134
135
136
137
138
139
140
141
142
143
144
145
146
147
148
149
150
151
152
153
154
155
156
157
158
159
160
161
162
163
164
165
166
<?xml version="1.0" encoding="UTF-8"?>
<!-- 日志级别从低到高分为TRACE < DEBUG < INFO < WARN < ERROR < FATAL,如果设置为WARN,则低于WARN的信息都不会输出 -->
<!-- scan: 当此属性设置为true时,配置文件如果发生改变,将会被重新加载,默认值为true -->
<!-- scanPeriod: 设置监测配置文件是否有修改的时间间隔,如果没有给出时间单位,默认单位是毫秒。当scan为true时,此属性生效。默认的时间间隔为1分钟。 -->
<!-- debug: 当此属性设置为true时,将打印出logback内部日志信息,实时查看logback运行状态。默认值为false。 -->
<configuration scan= "true" scanPeriod= "10 seconds" >
<!-- 日志上下文名称 -->
<contextName> my_logback</contextName>
<!-- name的值是变量的名称,value的值是变量定义的值。通过定义的值会被插入到logger上下文中。定义变量后,可以使“${}”来使用变量。 -->
<property name= "log.path" value= "${catalina.base}/service-consumer/logs" />
<!-- 彩色日志 -->
<!-- 彩色日志依赖的渲染类 -->
<conversionRule conversionWord= "clr" converterClass= "org.springframework.boot.logging.logback.ColorConverter" />
<conversionRule conversionWord= "wex" converterClass= "org.springframework.boot.logging.logback.WhitespaceThrowableProxyConverter" />
<conversionRule conversionWord= "wEx" converterClass= "org.springframework.boot.logging.logback.ExtendedWhitespaceThrowableProxyConverter" />
<!-- 彩色日志格式 -->
<property name= "CONSOLE_LOG_PATTERN" value= "${CONSOLE_LOG_PATTERN:-%clr(%d{yyyy-MM-dd HH:mm:ss.SSS}){faint} %clr(${LOG_LEVEL_PATTERN:-%5p}) %clr(${PID:- }){magenta} %clr(---){faint} %clr([%15.15t]){faint} %clr(%-40.40logger{39}){cyan} %clr(:){faint} %m%n${LOG_EXCEPTION_CONVERSION_WORD:-%wEx}}" />
<!-- 文件日志输入格式 -->
<property name= "FILE_LOG_PATTERN" value= "%d{yyyy-MM-dd HH:mm:ss.SSS} [%thread] %-5level %logger{50} - %msg%n" />
<!--输出到控制台-->
<appender name= "CONSOLE" class= "ch.qos.logback.core.ConsoleAppender" >
<!--此日志appender是为开发使用,只配置最底级别,控制台输出的日志级别是大于或等于此级别的日志信息-->
<filter class= "ch.qos.logback.classic.filter.ThresholdFilter" >
<level> DEBUG</level>
</filter>
<encoder>
<pattern> ${CONSOLE_LOG_PATTERN}</pattern>
<!-- 设置字符集 -->
<charset> UTF-8</charset>
</encoder>
</appender>
<!-- 输出到文件 -->
<!-- 时间滚动输出 level为 DEBUG 日志 -->
<appender name= "DEBUG_FILE" class= "ch.qos.logback.core.rolling.RollingFileAppender" >
<!-- 正在记录的日志文件的路径及文件名 -->
<file> ${log.path}/log_debug.log</file>
<!--日志文件输出格式-->
<encoder>
<pattern> ${FILE_LOG_PATTERN}</pattern>
<charset> UTF-8</charset> <!-- 设置字符集 -->
</encoder>
<!-- 日志记录器的滚动策略,按日期,按大小记录 -->
<rollingPolicy class= "ch.qos.logback.core.rolling.TimeBasedRollingPolicy" >
<!-- 日志归档 -->
<fileNamePattern> ${log.path}/debug/log-debug-%d{yyyy-MM-dd}.%i.log</fileNamePattern>
<timeBasedFileNamingAndTriggeringPolicy class= "ch.qos.logback.core.rolling.SizeAndTimeBasedFNATP" >
<maxFileSize> 100MB</maxFileSize>
</timeBasedFileNamingAndTriggeringPolicy>
<!--日志文件保留天数-->
<maxHistory> 15</maxHistory>
</rollingPolicy>
<!-- 此日志文件只记录debug级别的 -->
<filter class= "ch.qos.logback.classic.filter.LevelFilter" >
<level> DEBUG</level>
<onMatch> ACCEPT</onMatch>
<onMismatch> DENY</onMismatch>
</filter>
</appender>
<!-- 时间滚动输出 level为 INFO 日志 -->
<appender name= "INFO_FILE" class= "ch.qos.logback.core.rolling.RollingFileAppender" >
<!-- 正在记录的日志文件的路径及文件名 -->
<file> ${log.path}/log_info.log</file>
<!--日志文件输出格式-->
<encoder>
<pattern> ${FILE_LOG_PATTERN}</pattern>
<charset> UTF-8</charset>
</encoder>
<!-- 日志记录器的滚动策略,按日期,按大小记录 -->
<rollingPolicy class= "ch.qos.logback.core.rolling.TimeBasedRollingPolicy" >
<!-- 每天日志归档路径以及格式 -->
<fileNamePattern> ${log.path}/info/log-info-%d{yyyy-MM-dd}.%i.log</fileNamePattern>
<timeBasedFileNamingAndTriggeringPolicy class= "ch.qos.logback.core.rolling.SizeAndTimeBasedFNATP" >
<maxFileSize> 100MB</maxFileSize>
</timeBasedFileNamingAndTriggeringPolicy>
<!--日志文件保留天数-->
<maxHistory> 15</maxHistory>
</rollingPolicy>
<!-- 此日志文件只记录info级别的 -->
<filter class= "ch.qos.logback.classic.filter.LevelFilter" >
<level> INFO</level>
<onMatch> ACCEPT</onMatch>
<onMismatch> DENY</onMismatch>
</filter>
</appender>
<!-- 时间滚动输出 level为 WARN 日志 -->
<appender name= "WARN_FILE" class= "ch.qos.logback.core.rolling.RollingFileAppender" >
<!-- 正在记录的日志文件的路径及文件名 -->
<file> ${log.path}/log_warn.log</file>
<!--日志文件输出格式-->
<encoder>
<pattern> ${FILE_LOG_PATTERN}</pattern>
<charset> UTF-8</charset> <!-- 此处设置字符集 -->
</encoder>
<!-- 日志记录器的滚动策略,按日期,按大小记录 -->
<rollingPolicy class= "ch.qos.logback.core.rolling.TimeBasedRollingPolicy" >
<fileNamePattern> ${log.path}/warn/log-warn-%d{yyyy-MM-dd}.%i.log</fileNamePattern>
<!-- 每个日志文件最大100MB -->
<timeBasedFileNamingAndTriggeringPolicy class= "ch.qos.logback.core.rolling.SizeAndTimeBasedFNATP" >
<maxFileSize> 100MB</maxFileSize>
</timeBasedFileNamingAndTriggeringPolicy>
<!--日志文件保留天数-->
<maxHistory> 15</maxHistory>
</rollingPolicy>
<!-- 此日志文件只记录warn级别的 -->
<filter class= "ch.qos.logback.classic.filter.LevelFilter" >
<level> WARN</level>
<onMatch> ACCEPT</onMatch>
<onMismatch> DENY</onMismatch>
</filter>
</appender>
<!-- 时间滚动输出 level为 ERROR 日志 -->
<appender name= "ERROR_FILE" class= "ch.qos.logback.core.rolling.RollingFileAppender" >
<!-- 正在记录的日志文件的路径及文件名 -->
<file> ${log.path}/log_error.log</file>
<!--日志文件输出格式-->
<encoder>
<pattern> ${FILE_LOG_PATTERN}</pattern>
<charset> UTF-8</charset> <!-- 此处设置字符集 -->
</encoder>
<!-- 日志记录器的滚动策略,按日期,按大小记录 -->
<rollingPolicy class= "ch.qos.logback.core.rolling.TimeBasedRollingPolicy" >
<fileNamePattern> ${log.path}/error/log-error-%d{yyyy-MM-dd}.%i.log</fileNamePattern>
<timeBasedFileNamingAndTriggeringPolicy class= "ch.qos.logback.core.rolling.SizeAndTimeBasedFNATP" >
<maxFileSize> 100MB</maxFileSize>
</timeBasedFileNamingAndTriggeringPolicy>
<!--日志文件保留天数-->
<maxHistory> 15</maxHistory>
<!-- 日志量最大 10 GB -->
<totalSizeCap> 10GB</totalSizeCap>
</rollingPolicy>
<!-- 此日志文件只记录ERROR级别的 -->
<filter class= "ch.qos.logback.classic.filter.LevelFilter" >
<level> ERROR</level>
<onMatch> ACCEPT</onMatch>
<onMismatch> DENY</onMismatch>
</filter>
</appender>
<!-- 对于类路径以 com.example.logback 开头的Logger,输出级别设置为warn,并且只输出到控制台 -->
<!-- 这个logger没有指定appender,它会继承root节点中定义的那些appender -->
<!-- <logger name="com.example.logback" level="warn"/> -->
<!--通过 LoggerFactory.getLogger("myLog") 可以获取到这个logger-->
<!--由于这个logger自动继承了root的appender,root中已经有stdout的appender了,自己这边又引入了stdout的appender-->
<!--如果没有设置 additivity="false" ,就会导致一条日志在控制台输出两次的情况-->
<!--additivity表示要不要使用rootLogger配置的appender进行输出-->
<logger name= "myLog" level= "INFO" additivity= "false" >
<appender-ref ref= "CONSOLE" />
</logger>
<!-- 日志输出级别及方式 -->
<root level= "DEBUG" >
<appender-ref ref= "CONSOLE" />
<appender-ref ref= "DEBUG_FILE" />
<appender-ref ref= "INFO_FILE" />
<appender-ref ref= "WARN_FILE" />
<appender-ref ref= "ERROR_FILE" />
</root>
</configuration>
全局
Consumer 项目启动类中注入 Feign 的 Logger 对象。
 1
 2
 3
 4
 5
 6
 7
 8
 9
10
/*
NONE:不记录任何信息,默认值
BASIC:记录请求方法、请求 URL、状态码和用时
HEADERS:在 BASIC 基础上再记录一些常用信息
FULL:记录请求和相应的所有信息
*/
@Bean
public Logger . Level getLog () {
return Logger . Level . FULL ;
}
局部
Consumer 项目 application.yml 中指定服务开启状态查看。
1
2
3
4
5
feign :
client :
config :
service-provider : # 需要调用的服务名称
loggerLevel : FULL
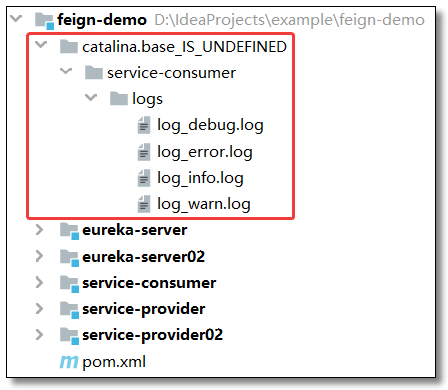
测试
项目运行以后会对不同级别的信息进行分类收集,效果如下:
访问:http://localhost:9090/order/1 核心日志信息如下:
 1
 2
 3
 4
 5
 6
 7
 8
 9
10
11
12
13
14
15
16
17
18
19
20
21
22
23
24
25
26
27
28
29
30
31
32
33
34
35
36
37
38
39
40
41
42
43
44
45
46
47
48
49
50
51
52
53
54
55
56
57
58
59
60
61
62
63
64
[ nio-9090-exec-7] o.s.web.servlet.DispatcherServlet : GET "/order/1" , parameters ={}
[ nio-9090-exec-7] s.w.s.m.m.a.RequestMappingHandlerMapping : Mapped to com.example.controller.OrderController#selectOrderById( Integer)
[ nio-9090-exec-7] com.example.service.ProductService : [ ProductService#selectProductById] ---> GET http://service-provider/product/1 HTTP/1.1
[ nio-9090-exec-7] com.example.service.ProductService : [ ProductService#selectProductById] ---> END HTTP ( 0-byte body)
[ nio-9090-exec-7] c.n.loadbalancer.ZoneAwareLoadBalancer : Zone aware logic disabled or there is only one zone
[ nio-9090-exec-7] c.n.loadbalancer.LoadBalancerContext : service-provider using LB returned Server: 192.168.31.103:7070 for request http:///product/1
[ nio-9090-exec-7] o.a.h.client.protocol.RequestAuthCache : Auth cache not set in the context
[ nio-9090-exec-7] h.i.c.PoolingHttpClientConnectionManager : Connection request: [ route: {} ->http://192.168.31.103:7070][ total kept alive: 0; route allocated: 0 of 50; total allocated: 0 of 200]
[ nio-9090-exec-7] h.i.c.PoolingHttpClientConnectionManager : Connection leased: [ id: 2][ route: {} ->http://192.168.31.103:7070][ total kept alive: 0; route allocated: 1 of 50; total allocated: 1 of 200]
[ nio-9090-exec-7] o.a.http.impl.execchain.MainClientExec : Opening connection {} ->http://192.168.31.103:7070
[ nio-9090-exec-7] .i.c.DefaultHttpClientConnectionOperator : Connecting to /192.168.31.103:7070
[ nio-9090-exec-7] .i.c.DefaultHttpClientConnectionOperator : Connection established 192.168.31.103:12816<->192.168.31.103:7070
[ nio-9090-exec-7] h.i.c.DefaultManagedHttpClientConnection : http-outgoing-2: set socket timeout to 3000
[ nio-9090-exec-7] o.a.http.impl.execchain.MainClientExec : Executing request GET /product/1 HTTP/1.1
[ nio-9090-exec-7] o.a.http.impl.execchain.MainClientExec : Target auth state: UNCHALLENGED
[ nio-9090-exec-7] o.a.http.impl.execchain.MainClientExec : Proxy auth state: UNCHALLENGED
[ nio-9090-exec-7] org.apache.http.headers : http-outgoing-2 >> GET /product/1 HTTP/1.1
[ nio-9090-exec-7] org.apache.http.headers : http-outgoing-2 >> Accept: */*
[ nio-9090-exec-7] org.apache.http.headers : http-outgoing-2 >> Content-Length: 0
[ nio-9090-exec-7] org.apache.http.headers : http-outgoing-2 >> Host: 192.168.31.103:7070
[ nio-9090-exec-7] org.apache.http.headers : http-outgoing-2 >> Connection: Keep-Alive
[ nio-9090-exec-7] org.apache.http.headers : http-outgoing-2 >> User-Agent: Apache-HttpClient/4.5.10 ( Java/11.0.6)
[ nio-9090-exec-7] org.apache.http.wire : http-outgoing-2 >> "GET /product/1 HTTP/1.1[\r][\n]"
[ nio-9090-exec-7] org.apache.http.wire : http-outgoing-2 >> "Accept: */*[\r][\n]"
[ nio-9090-exec-7] org.apache.http.wire : http-outgoing-2 >> "Content-Length: 0[\r][\n]"
[ nio-9090-exec-7] org.apache.http.wire : http-outgoing-2 >> "Host: 192.168.31.103:7070[\r][\n]"
[ nio-9090-exec-7] org.apache.http.wire : http-outgoing-2 >> "Connection: Keep-Alive[\r][\n]"
[ nio-9090-exec-7] org.apache.http.wire : http-outgoing-2 >> "User-Agent: Apache-HttpClient/4.5.10 (Java/11.0.6)[\r][\n]"
[ nio-9090-exec-7] org.apache.http.wire : http-outgoing-2 >> "[\r][\n]"
[ nio-9090-exec-7] org.apache.http.wire : http-outgoing-2 << "HTTP/1.1 200 [\r][\n]"
[ nio-9090-exec-7] org.apache.http.wire : http-outgoing-2 << "Content-Type: application/json[\r][\n]"
[ nio-9090-exec-7] org.apache.http.wire : http-outgoing-2 << "Transfer-Encoding: chunked[\r][\n]"
[ nio-9090-exec-7] org.apache.http.wire : http-outgoing-2 << "Date: Thu, 13 Feb 2020 10:53:35 GMT[\r][\n]"
[ nio-9090-exec-7] org.apache.http.wire : http-outgoing-2 << "Keep-Alive: timeout=60[\r][\n]"
[ nio-9090-exec-7] org.apache.http.wire : http-outgoing-2 << "Connection: keep-alive[\r][\n]"
[ nio-9090-exec-7] org.apache.http.wire : http-outgoing-2 << "[\r][\n]"
[ nio-9090-exec-7] org.apache.http.wire : http-outgoing-2 << "44[\r][\n]"
[ nio-9090-exec-7] org.apache.http.wire : http-outgoing-2 << "{" id":1," productName":" [ 0xe5][ 0x86][ 0xb0][ 0xe7][ 0xae][ 0xb1] "," productNum":1," productPrice":2666.0}[\r][\n]"
[ nio-9090-exec-7] org.apache.http.headers : http-outgoing-2 << HTTP/1.1 200
[nio-9090-exec-7] org.apache.http.headers : http-outgoing-2 << Content-Type: application/json
[nio-9090-exec-7] org.apache.http.headers : http-outgoing-2 << Transfer-Encoding: chunked
[nio-9090-exec-7] org.apache.http.headers : http-outgoing-2 << Date: Thu, 13 Feb 2020 10:53:35 GMT
[nio-9090-exec-7] org.apache.http.headers : http-outgoing-2 << Keep-Alive: timeout=60
[nio-9090-exec-7] org.apache.http.headers : http-outgoing-2 << Connection: keep-alive
[nio-9090-exec-7] o.a.http.impl.execchain.MainClientExec : Connection can be kept alive for 60000 MILLISECONDS
[nio-9090-exec-7] com.example.service.ProductService : [ProductService#selectProductById] <--- HTTP /1.1 200 ( 4ms)
[ nio-9090-exec-7] com.example.service.ProductService : [ ProductService#selectProductById] connection: keep-alive
[ nio-9090-exec-7] com.example.service.ProductService : [ ProductService#selectProductById] content-type: application/json
[ nio-9090-exec-7] com.example.service.ProductService : [ ProductService#selectProductById] date: Thu, 13 Feb 2020 10:53:35 GMT
[ nio-9090-exec-7] com.example.service.ProductService : [ ProductService#selectProductById] keep-alive: timeout = 60
[ nio-9090-exec-7] com.example.service.ProductService : [ ProductService#selectProductById] transfer-encoding: chunked
[ nio-9090-exec-7] com.example.service.ProductService : [ ProductService#selectProductById]
[ nio-9090-exec-7] org.apache.http.wire : http-outgoing-2 << "0[\r][\n]"
[ nio-9090-exec-7] org.apache.http.wire : http-outgoing-2 << "[\r][\n]"
[ nio-9090-exec-7] h.i.c.PoolingHttpClientConnectionManager : Connection [ id: 2][ route: {} ->http://192.168.31.103:7070] can be kept alive for 60.0 seconds
[ nio-9090-exec-7] h.i.c.DefaultManagedHttpClientConnection : http-outgoing-2: set socket timeout to 0
[ nio-9090-exec-7] h.i.c.PoolingHttpClientConnectionManager : Connection released: [ id: 2][ route: {} ->http://192.168.31.103:7070][ total kept alive: 1; route allocated: 1 of 50; total allocated: 1 of 200]
[ nio-9090-exec-7] com.example.service.ProductService : [ ProductService#selectProductById] { "id" :1,"productName" :"冰箱" ,"productNum" :1,"productPrice" :2666.0}
[ nio-9090-exec-7] com.example.service.ProductService : [ ProductService#selectProductById] <--- END HTTP ( 68-byte body)
[ nio-9090-exec-7] o.s.w.c.HttpMessageConverterExtractor : Reading to [ com.example.pojo.Product]
[ nio-9090-exec-7] m.m.a.RequestResponseBodyMethodProcessor : Using 'application/json;q=0.8' , given [ text/html, application/xhtml+xml, image/webp, image/apng, application/signed-exchange; v = b3, application/xml; q = 0.9, */*; q = 0.8] and supported [ application/json, application/*+json, application/json, application/*+json]
[ nio-9090-exec-7] m.m.a.RequestResponseBodyMethodProcessor : Writing [ Order( id = 1, orderNo = order-001, orderAddress = 中国, totalPrice = 2666.0, productList =[ Product( id = 1, produc ( truncated) ...]
[ nio-9090-exec-7] o.s.web.servlet.DispatcherServlet : Completed 200 OK
[ ionManagerTimer] h.i.c.PoolingHttpClientConnectionManager : Closing expired connections
请求超时
Feign 的负载均衡底层用的就是 Ribbon,所以这里的请求超时配置其实就是配置 Ribbon。
分布式项目中,服务压力比较大的情况下,可能处理服务的过程需要花费一定的时间,而默认情况下请求超时的配置是 1s 所以我们需要调整该配置延长请求超时时间。
全局
Consumer 项目中配置请求超时的处理。
1
2
3
ribbon :
ConnectTimeout : 5000 # 请求连接的超时时间 默认的时间为 1 秒
ReadTimeout : 5000 # 请求处理的超时时间
局部
一般我们会根据服务的压力大小配置不同的服务超时处理,使用局部配置。
1
2
3
4
5
6
7
8
# service-provider 是需要调用的服务名称
service-provider :
ribbon :
OkToRetryOnAllOperations : true # 对所有请求都进行重试
MaxAutoRetries : 2 # 对当前实例的重试次数
MaxAutoRetriesNextServer : 0 # 切换实例的重试次数
ConnectTimeout : 3000 # 请求连接的超时时间
ReadTimeout : 3000 # 请求处理的超时时间
至此 Feign 声明式服务调用所有的知识点就讲解结束了。
本文采用 知识共享「署名-非商业性使用-禁止演绎 4.0 国际」许可协议
大家可以通过 分类Spring Cloud
🤗 您的点赞和转发是对我最大的鼓励和支持。
📢 扫码关注 哈喽沃德先生「文档 + 视频」每篇文章都配有专门视频讲解,学习更轻松噢 ~