


2021 最新 IntelliJ IDEA 详细配置演示(图文版)
作为一名开发人员,第一肯定是选择一款趁手的开发利器,本人使用 Java 偏多,这里推荐使用 IntelliJ IDEA,具体的安装过程就不过多赘述了,这里将本人 IDEA 的配置信息说明一下,方便大家查找。
本文使用 IDEA 2020.3.2 2021年01月26日发布的版本,欢迎界面如下。
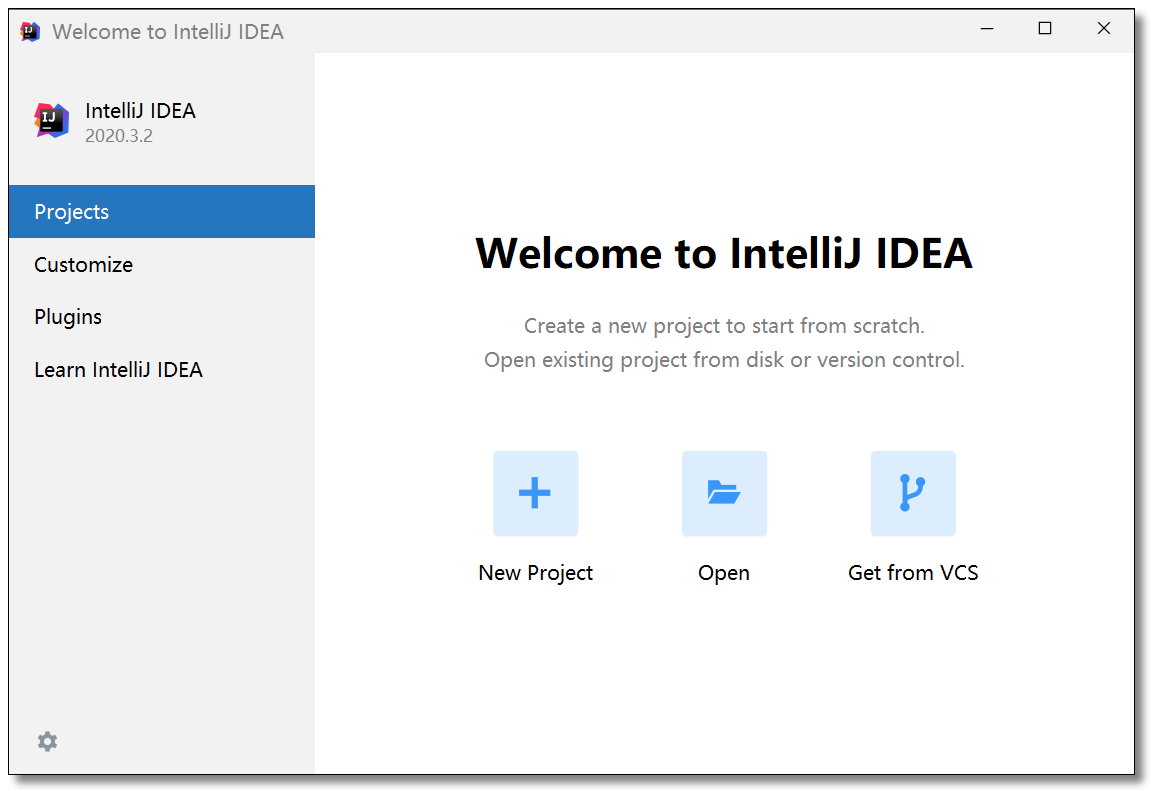
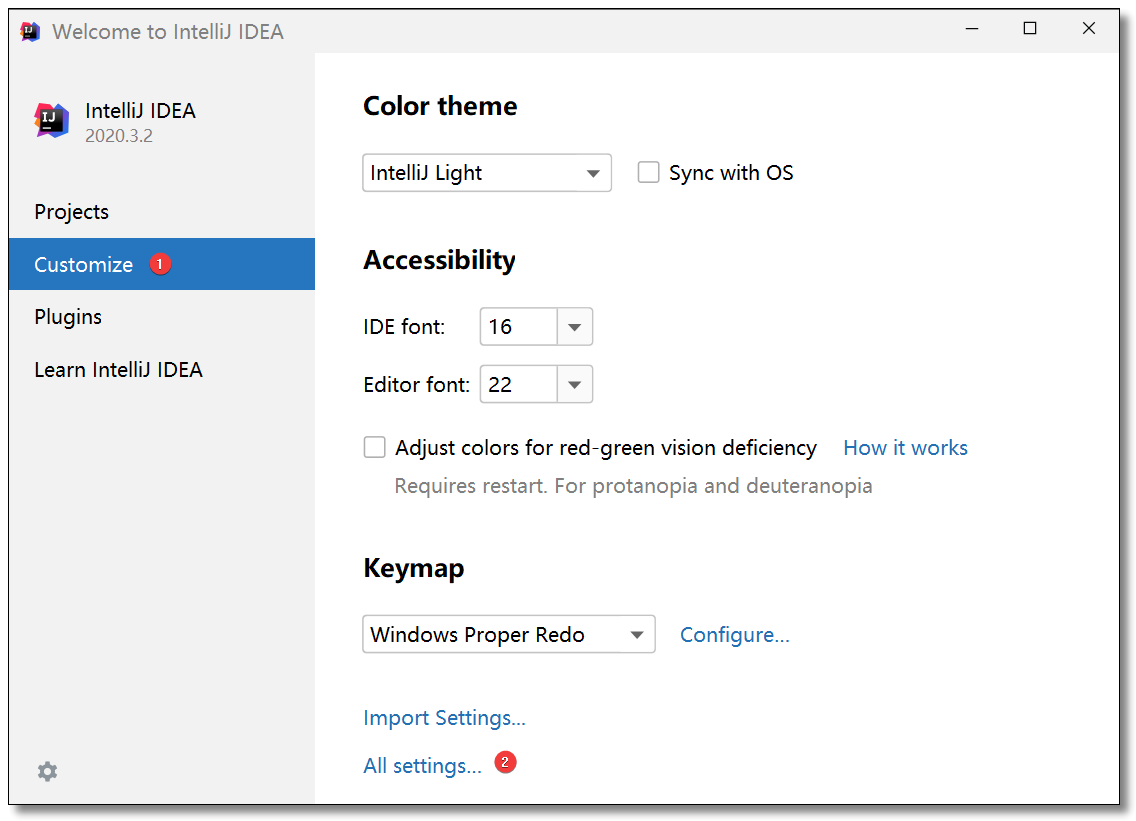
IDEA 新版本重新制作了欢迎界面,所有的配置项都可以直接在欢迎界面:Customize -> All settings...中进行设置,后续不再赘述。
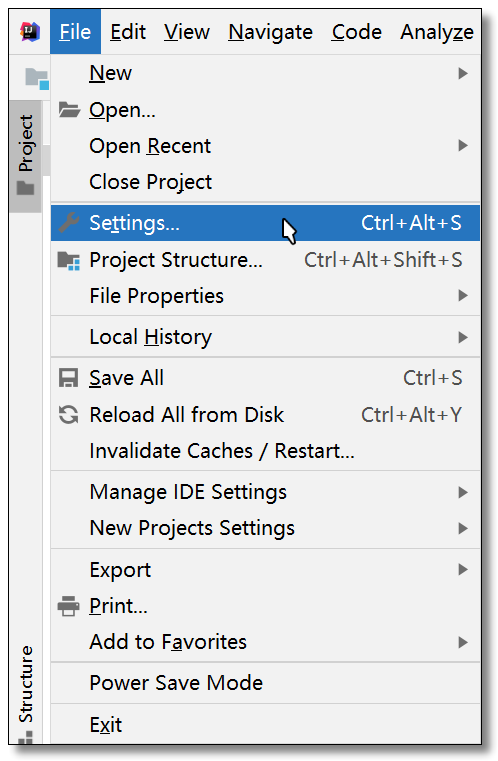
如果是打开项目的界面下,点击菜单:File -> Settings...进行设置。
设置 JDK
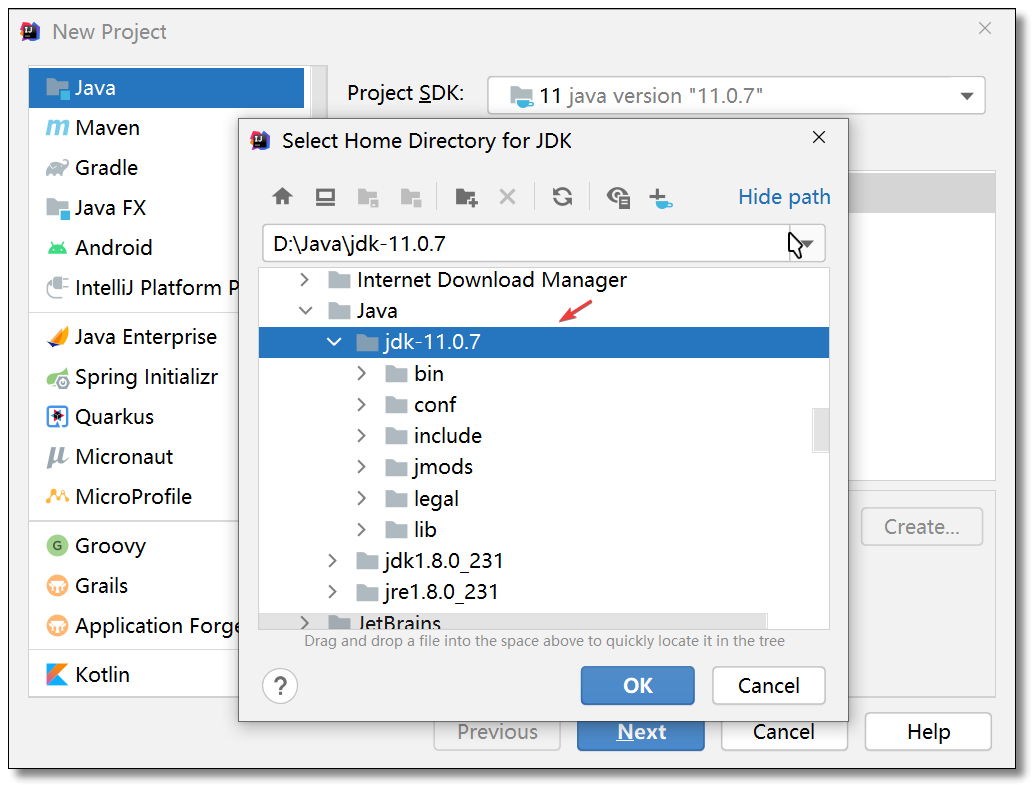
欢迎界面点击:Projects -> New Project,在弹出的窗口中选择Project SDK -> Add JDK...
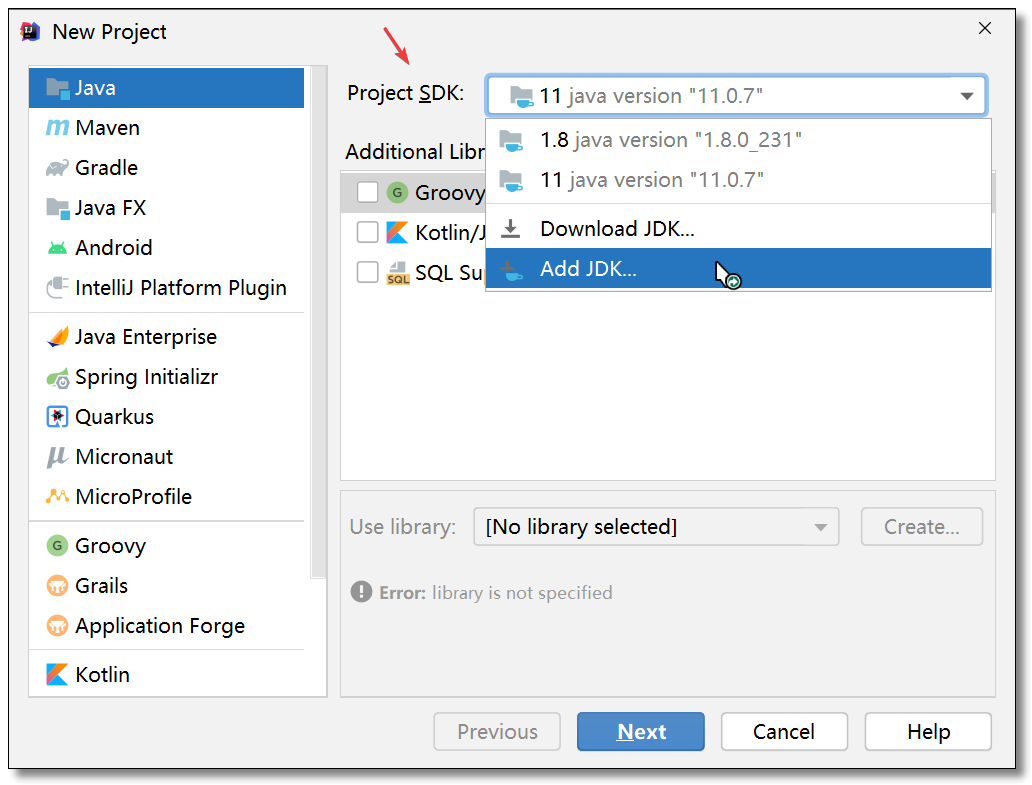
找到自己本地安装的 JDK 进行设置即可。
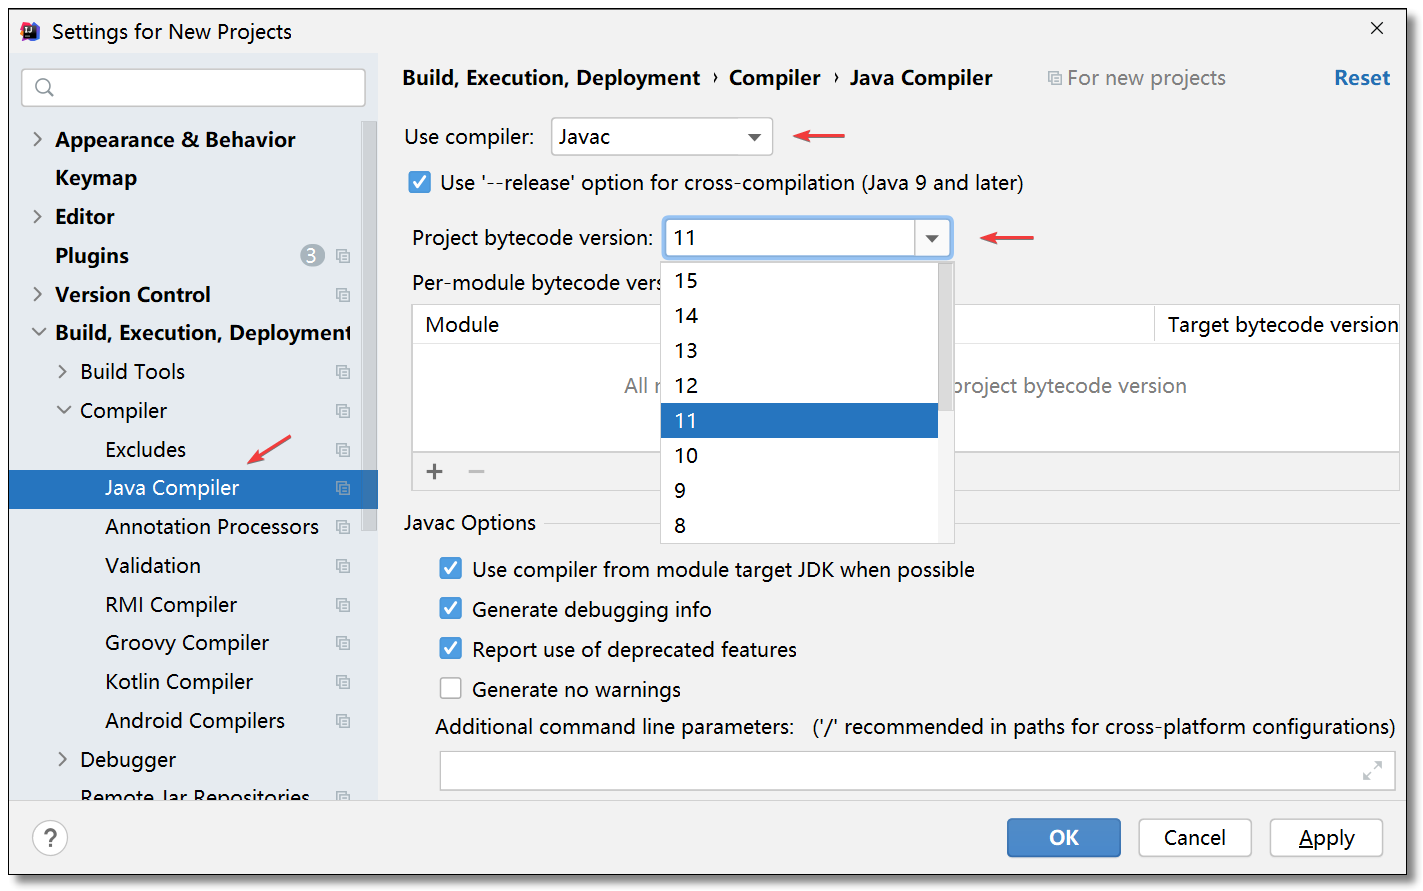
统一编译器和编译版本
推荐使用 Javac 编译器,Project bytecode version 根据当前项目使用的 JDK 版本进行统一。
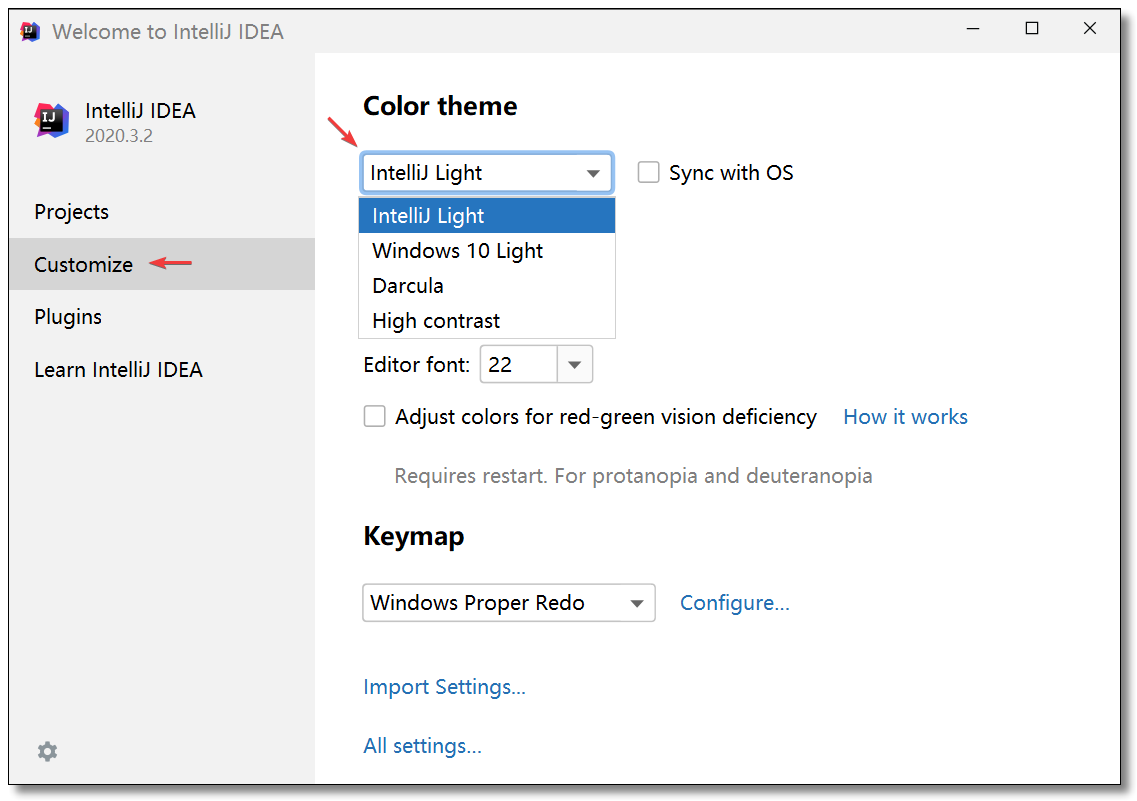
设置主题
方式一
在新版本的欢迎界面中可以直接进行主题设置,点击:Customize,在Color theme下拉框中进行选择。
方式二
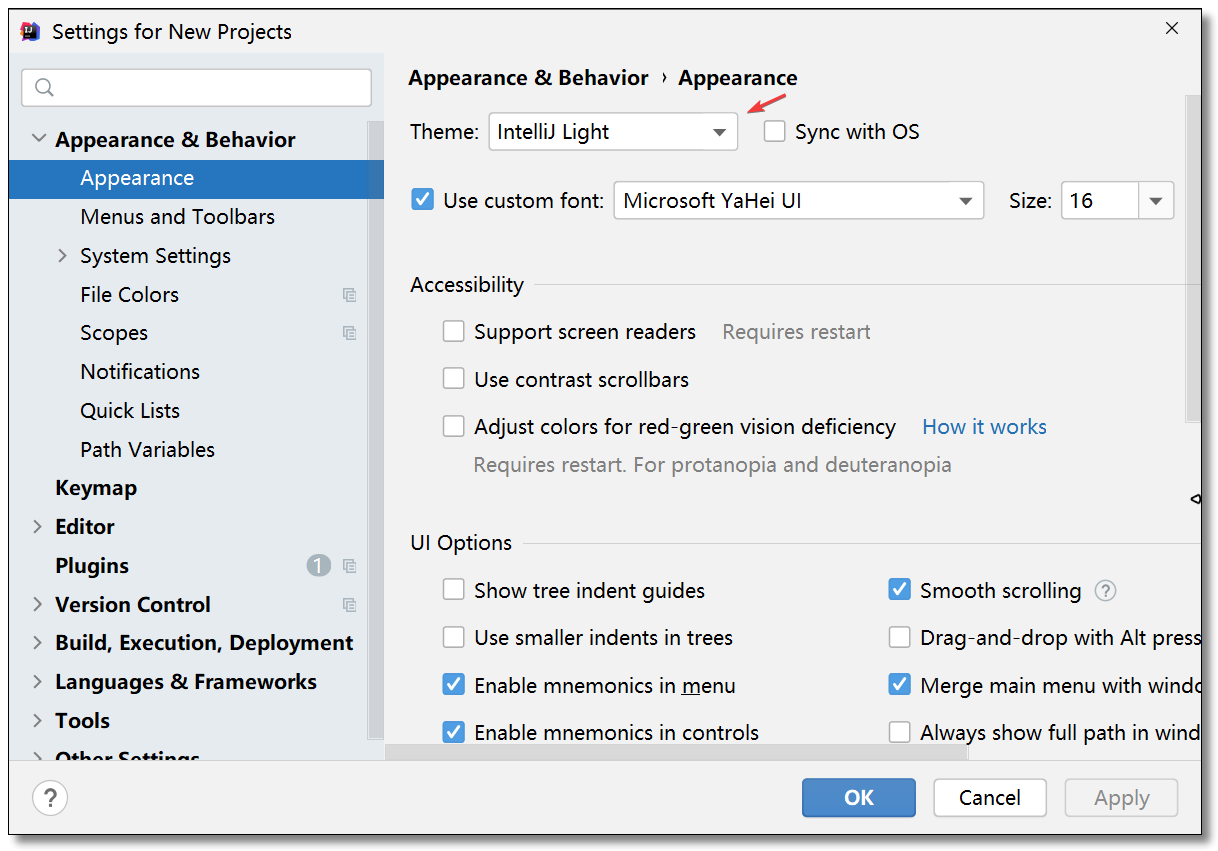
欢迎界面点击:Customize -> All settings...,在外观和行为Appearance & Behavior中选择Appearance进行设置。
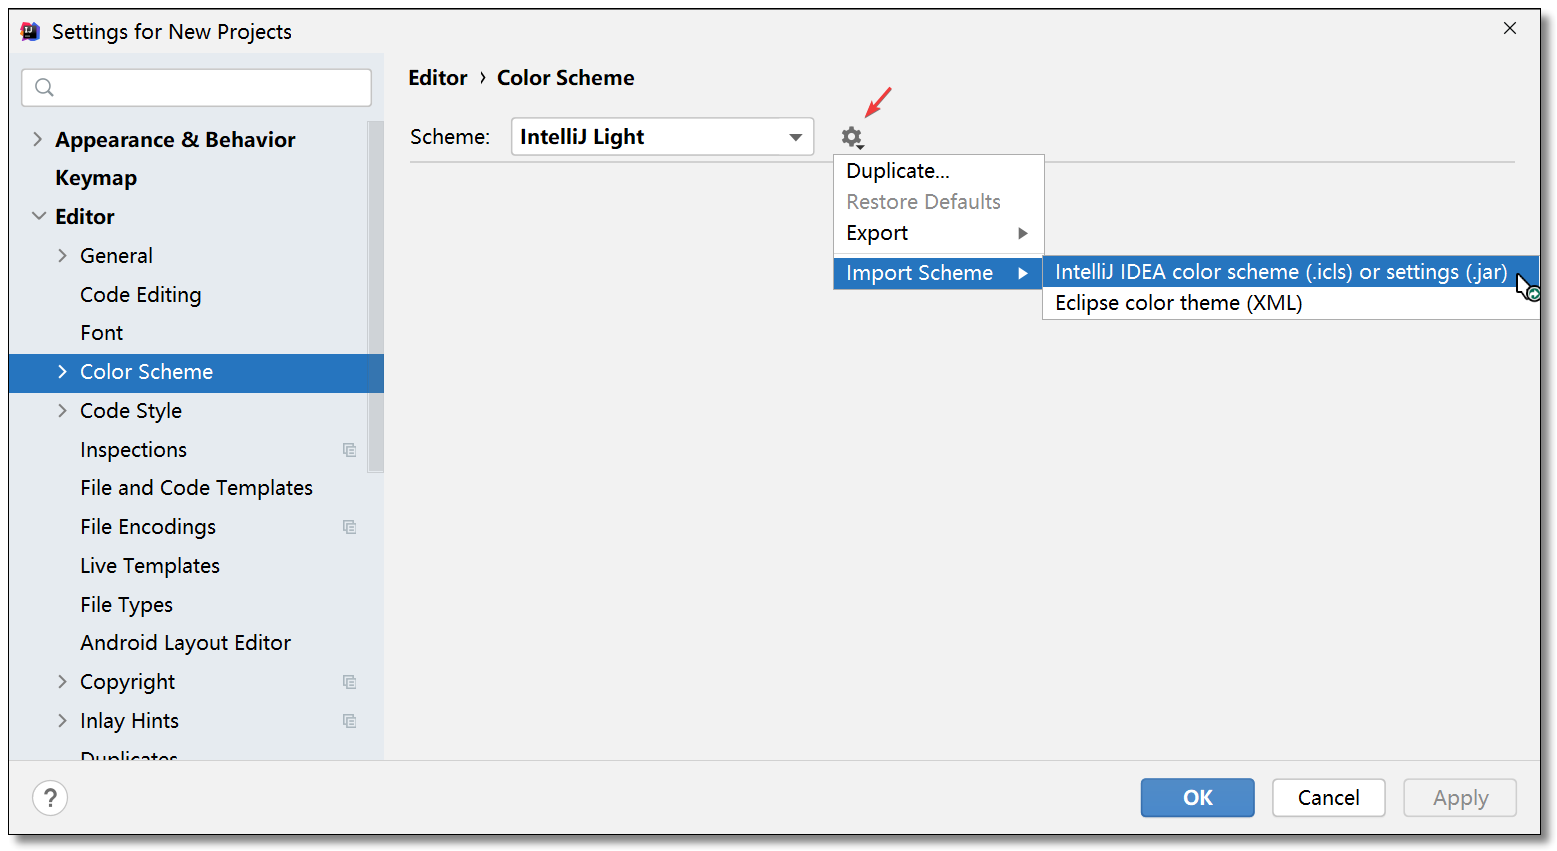
安装主题
更多主题大家可以通过:http://www.riaway.com/ 下载并安装。
安装方法:Editor -> Color Scheme,点击齿轮 -> Import Scheme进行导入。
设置字体
方式一
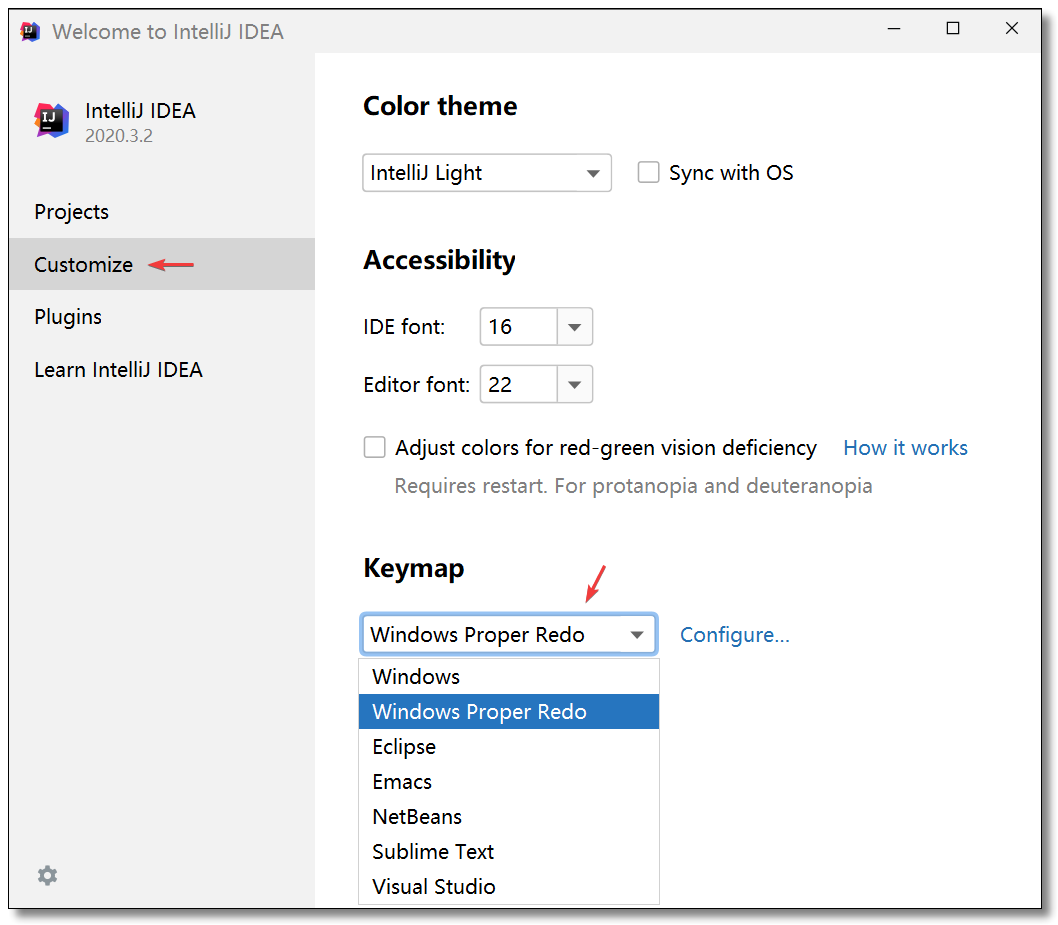
在新版本的欢迎界面中可以直接进行字体设置,点击:Customize,在Accessibility中进行设置。
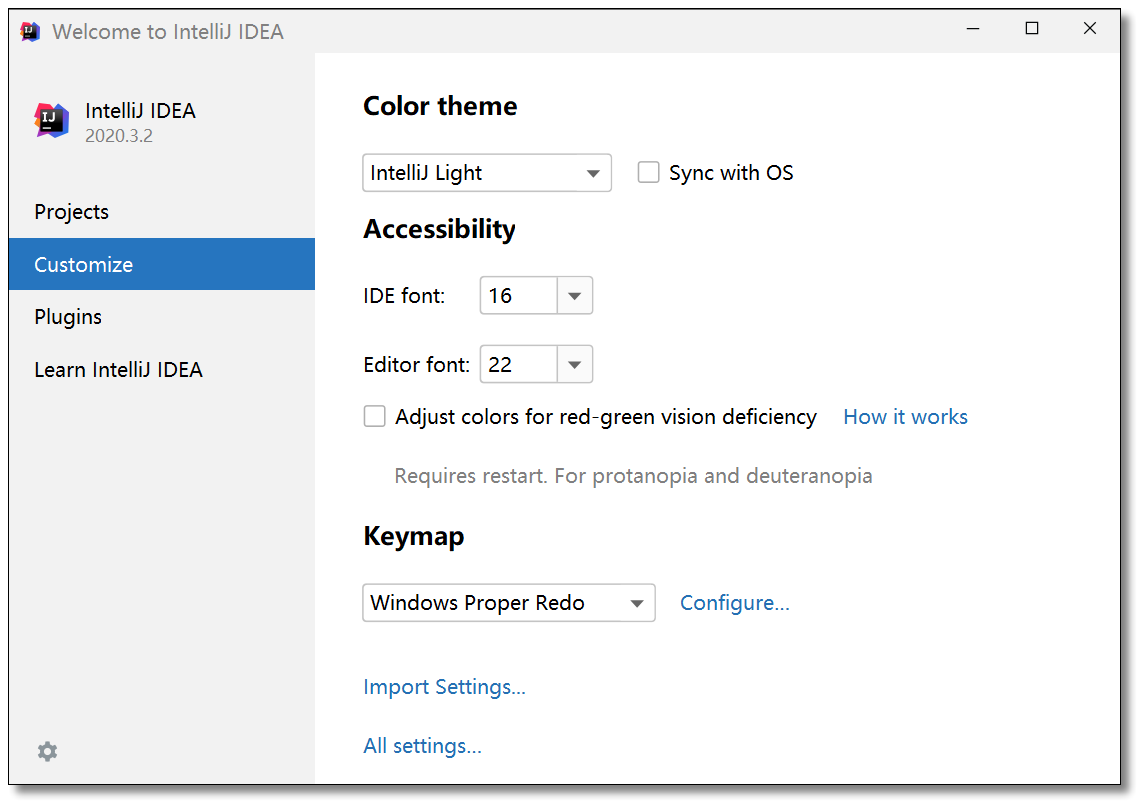
IDE font:设置 IDEA 界面字体大小Editor font:设置文本(也就是我们写的代码)字体大小
方式二
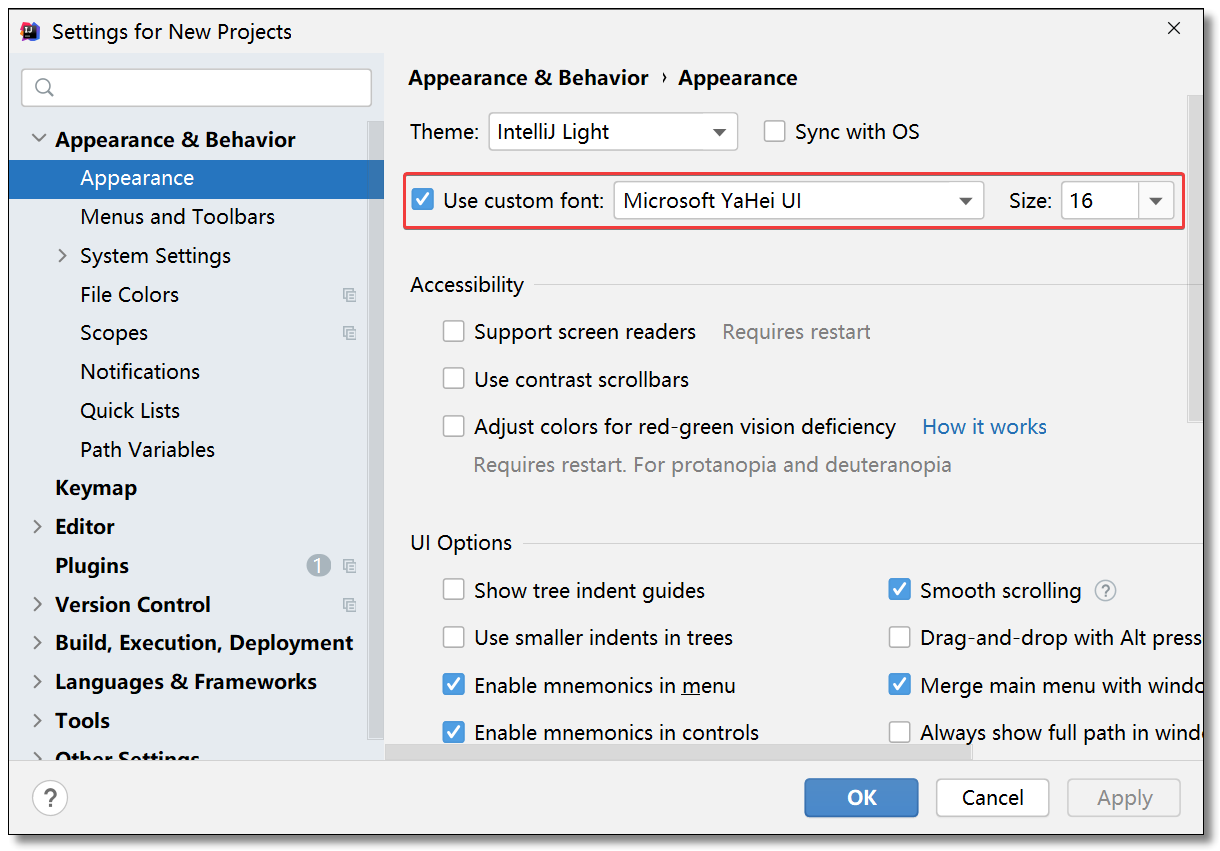
欢迎界面点击:Customize -> All settings...,在外观和行为Appearance & Behavior中选择Appearance设置 IDEA 界面字体及大小。
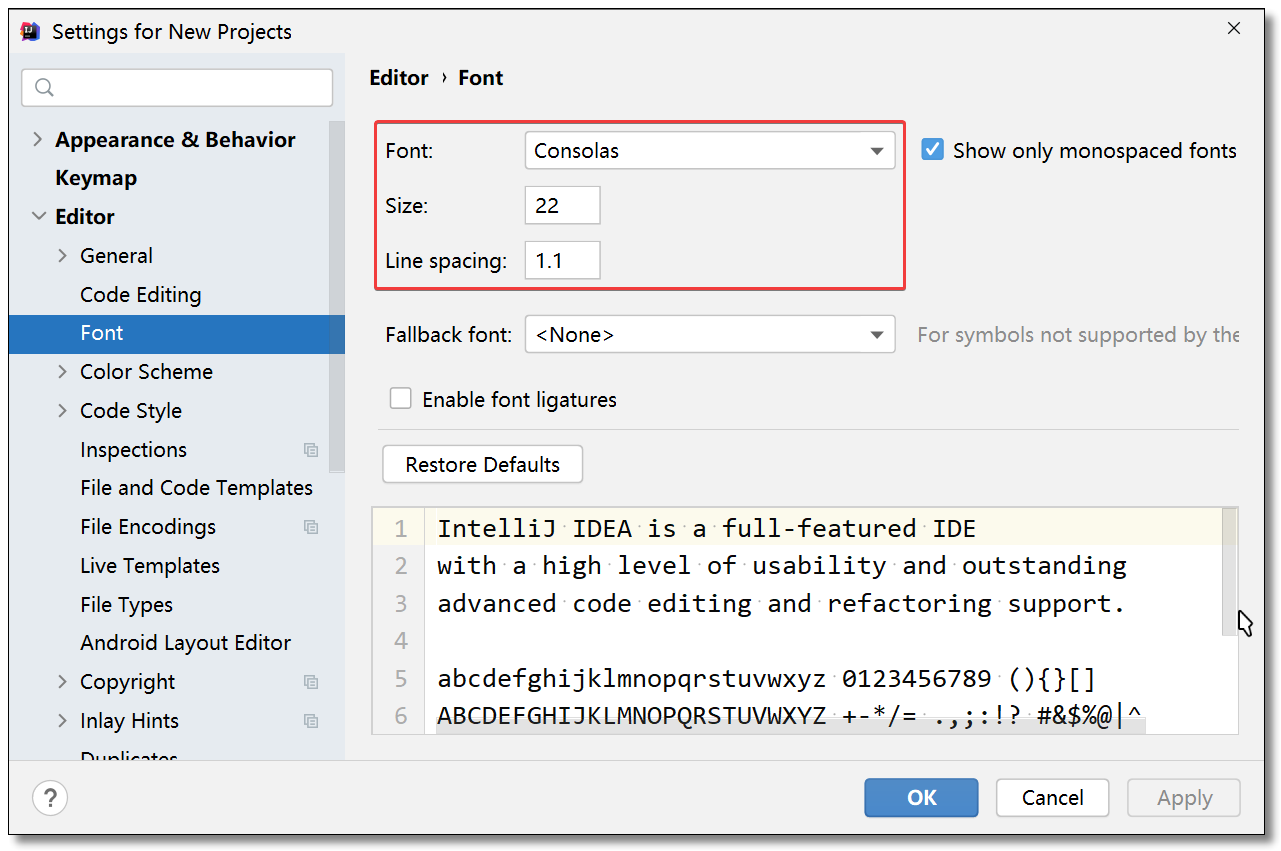
欢迎界面点击:Customize -> All settings...,在编辑Editor中选择font设置文本(也就是我们写的代码)字体及大小及行间距。
鼠标滚轮修改字体大小
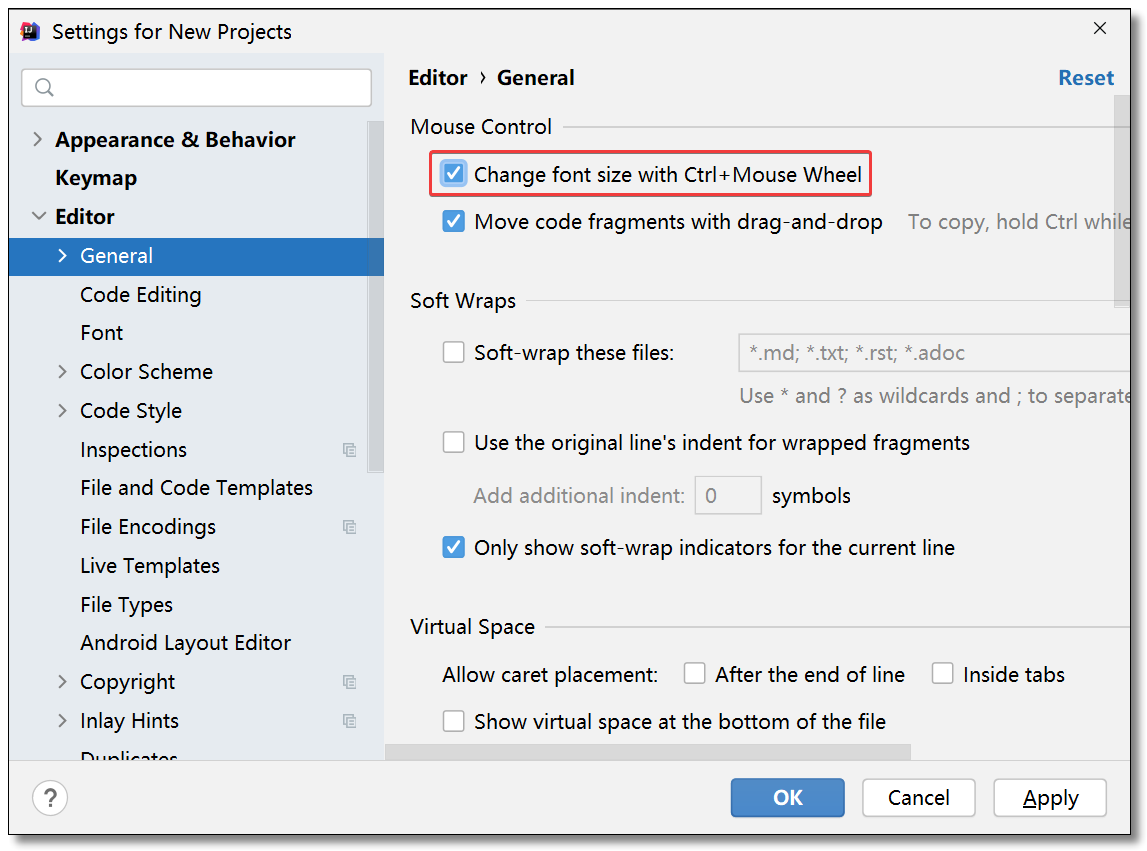
如果需要随时随地的更改文本字体大小,在编辑Editor中选择General,如下图勾选Change font size with Ctrl+Mouse Wheel即可通过Ctrl + 鼠标滚轮修改字体大小。
控制台字体
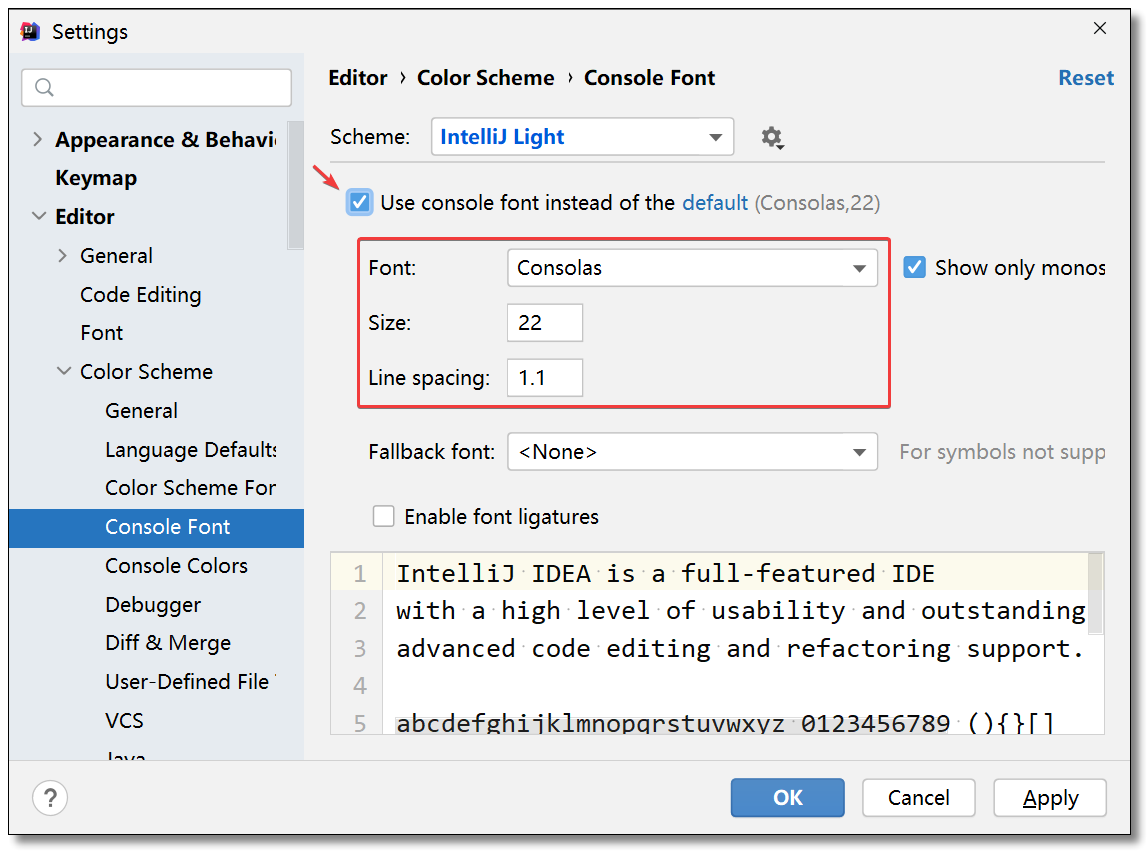
默认情况下无需调整,会跟随Editor font使用一致的设置,如需自定义如下:Editor -> Color Scheme -> Console Font,勾选下图中选项即可进行设置。
快捷键
方式一
在新版本的欢迎界面中可以直接进行字体设置,点击:Customize,在Keymap下拉框中进行选择。
方式二
欢迎界面点击:Customize -> All settings... -> Keymap下拉框中进行选择。
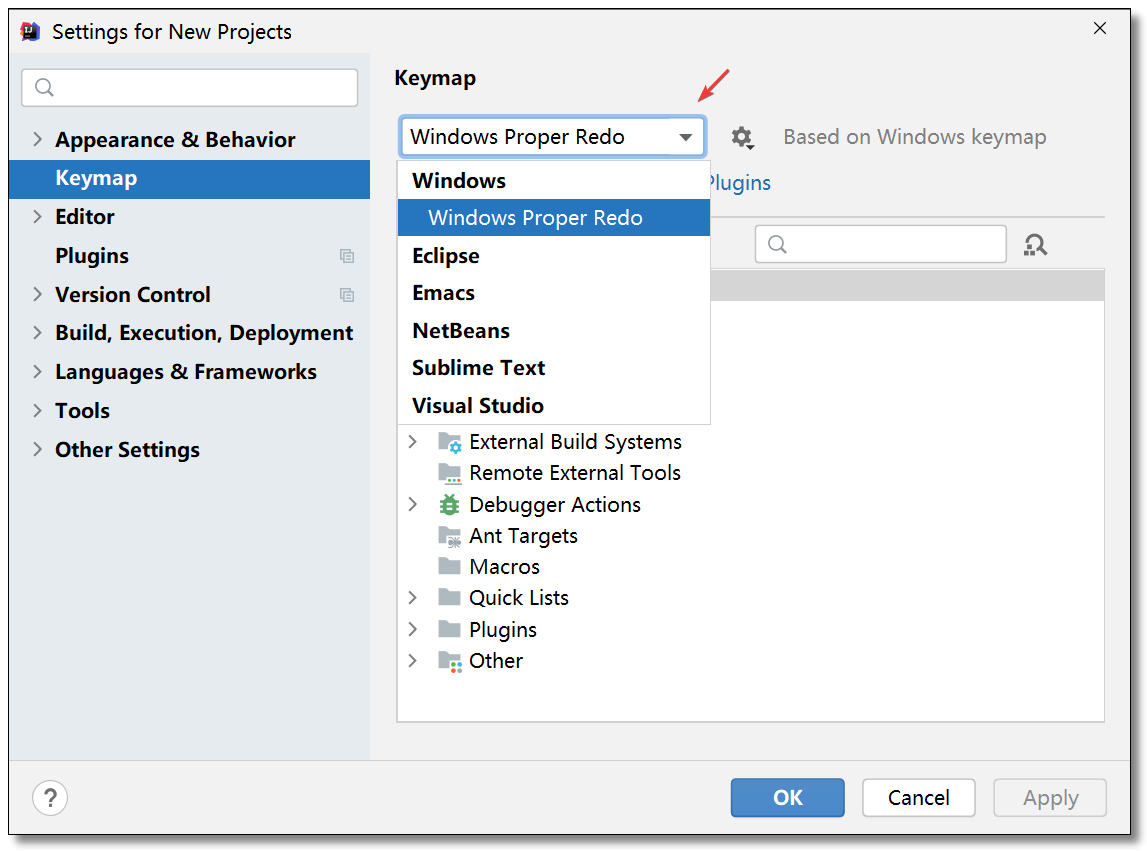
建议
如果大家开发过程中使用多种开发工具,可以将快捷键设置为同一种方便使用。
如果你是一名初学者,没有接触过其他开发工具且主要使用 IDEA,此处不用修改默认即可。
关闭扁平化显示并隐藏空包
如果你的项目包结构突然成为下图中的样子,可能是因为你开启了 Flatten Packages 导致的。
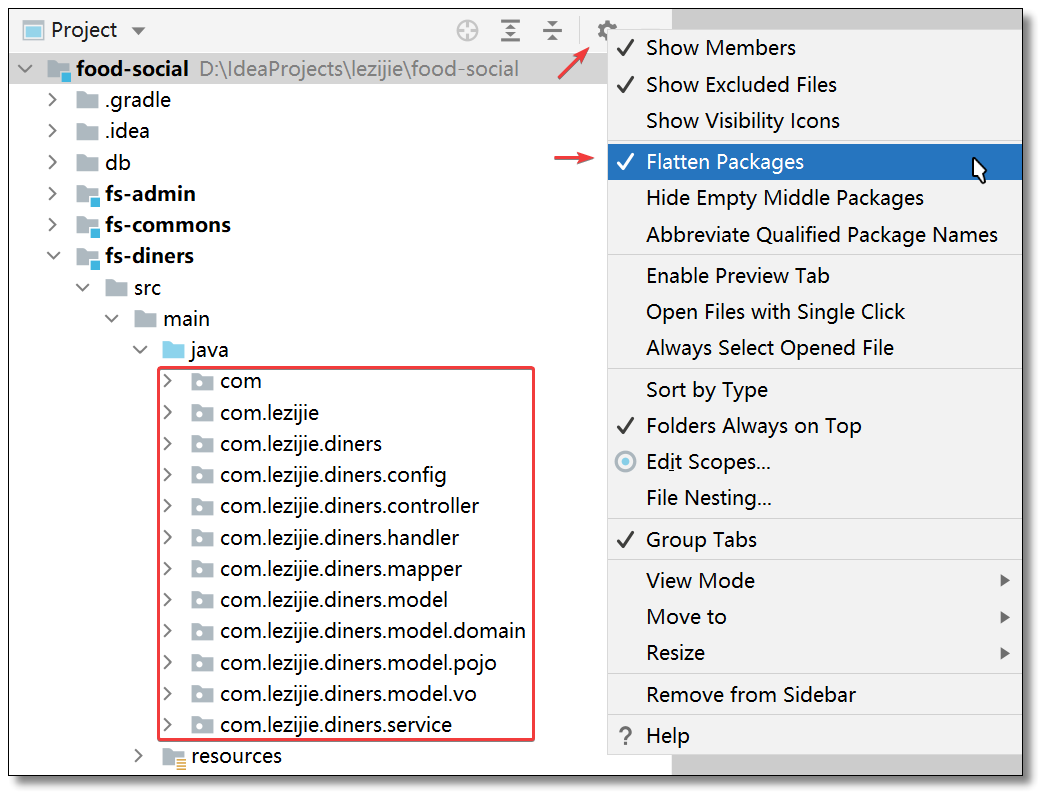
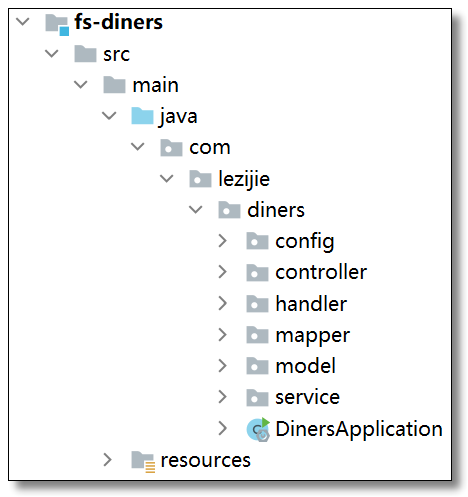
关闭此功能(关闭扁平化显示)效果如下:
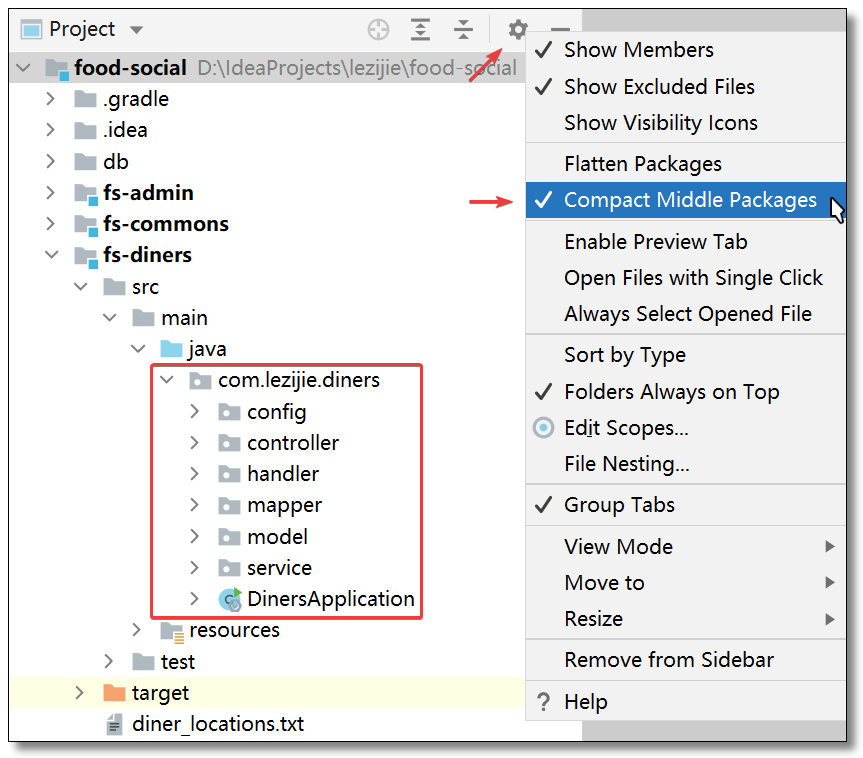
然后再开启隐藏空包 Compact Middle Packages 功能,食用效果更佳:
显示方法和属性
勾选 Show Members 可以显示类的方法和属性,鼠标点击对应的方法或属性可以快速打开并定位。

自动导包
编写代码时经常会用到很多第三方的包,每次都需要自己手动(Alt + Enter)进行导入,通过以下设置可以开启自动导包功能。
Settings -> Editor -> General -> Auto Import,选择Always且勾选下图中两个选项即可。
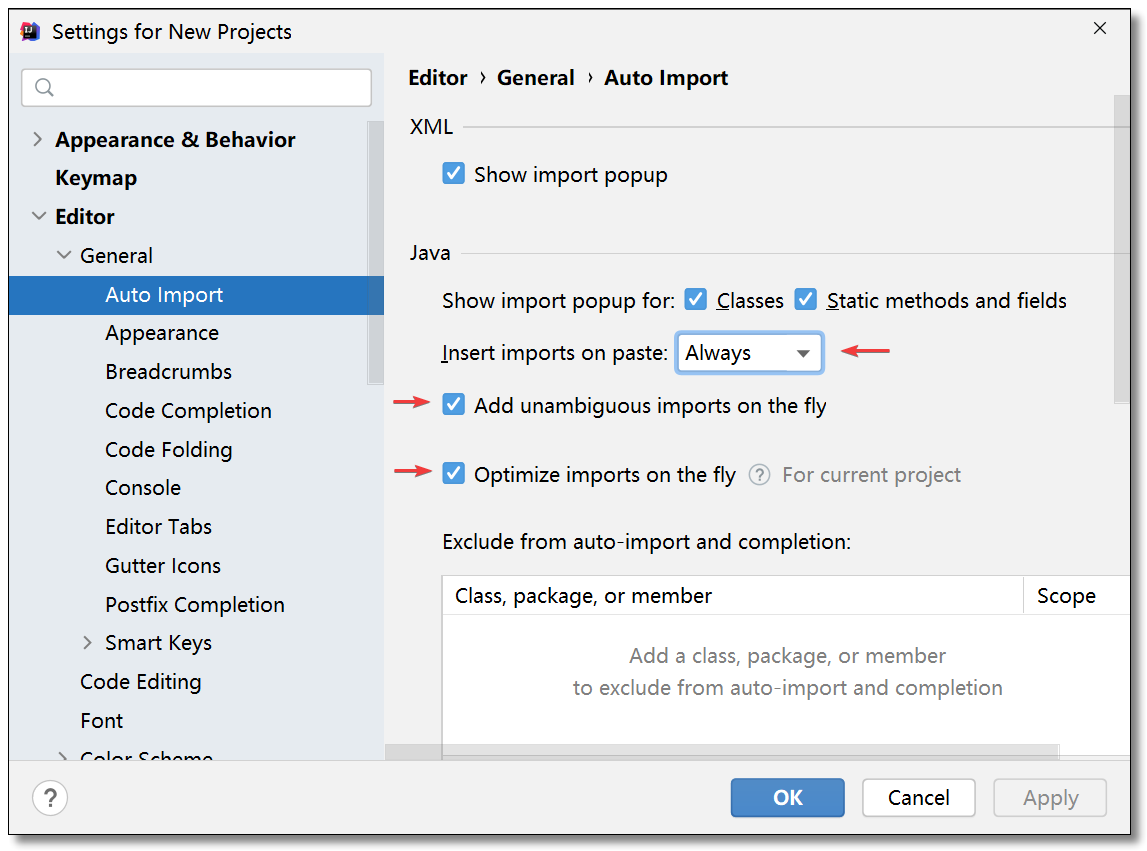
Insert imports on paste有三个选项,新旧版本对照如下:
| 新 | 旧 |
|---|---|
| Always | All |
| Never | None |
| Ask | Ask |
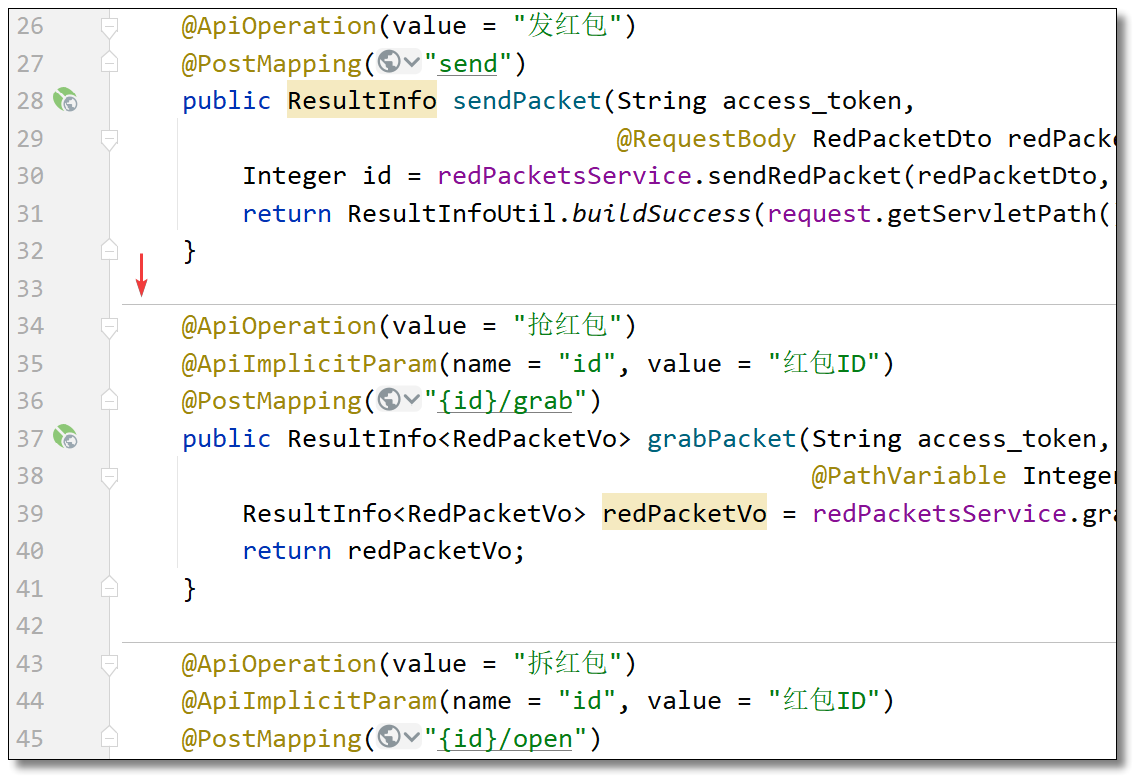
行号和方法分隔符
Settings -> Editor -> General -> Appearance勾选下图中两个选项即可。
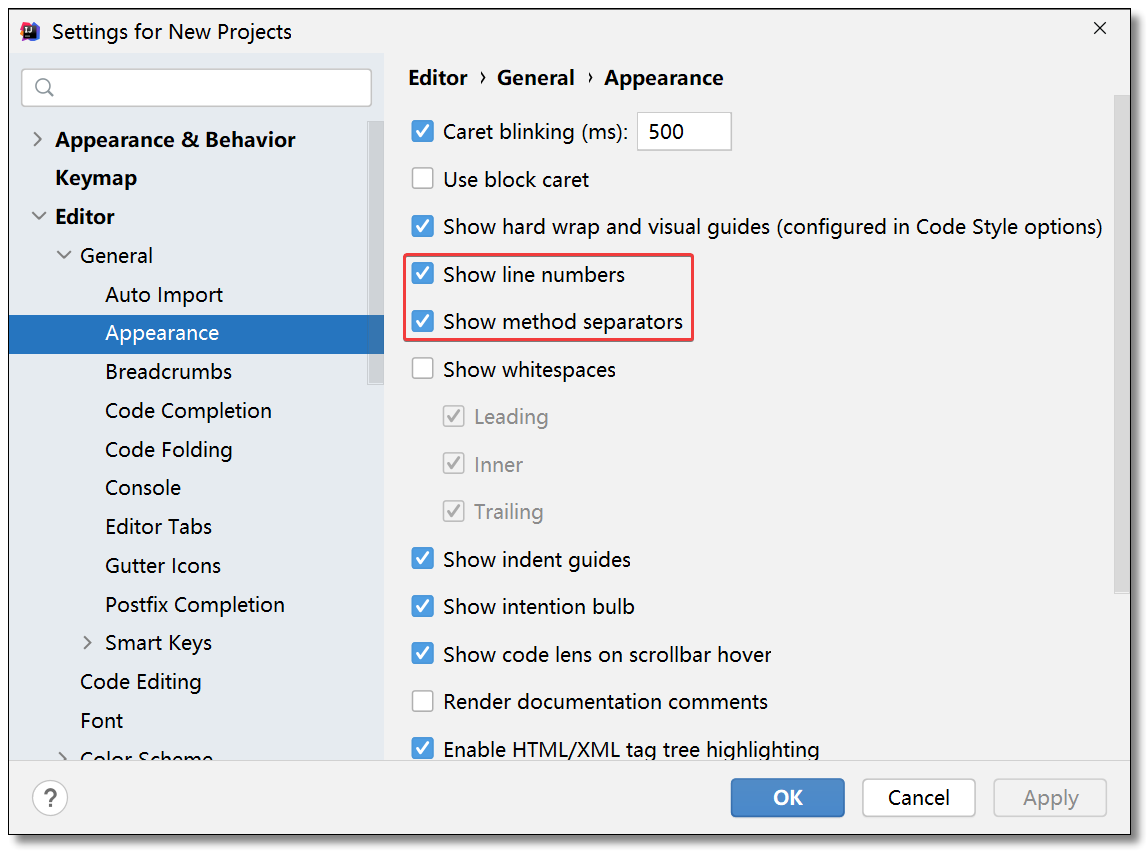
效果如下:
忽略大小写字母
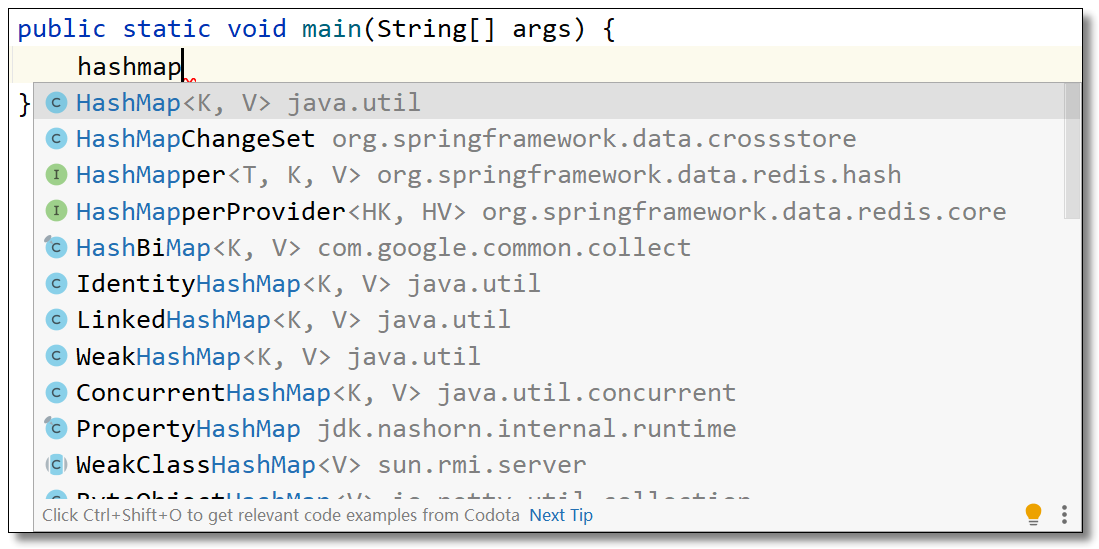
编写代码时导入类默认是要大小写全匹配的,极大的影响了开发效率,通过以下设置可以忽略大小写字母。
Settings -> Editor -> General -> Code Completion取消勾选下图中选项即可。
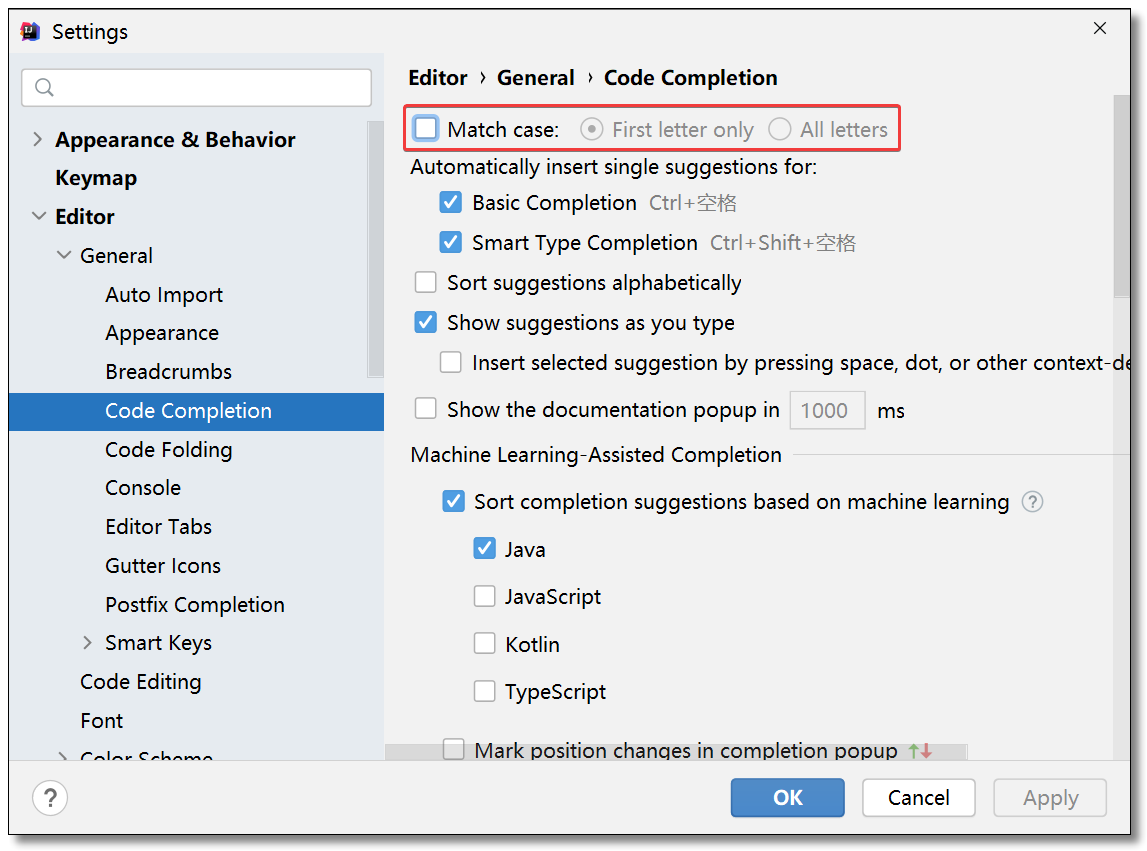
效果如下:
多行显示
开发时可能会打开很多文件,默认情况下会堆积在一行显示,右侧通过箭头筛选的方式选择其他文件,开启该配置以后所有文件可以多行显示在头部方便查看。
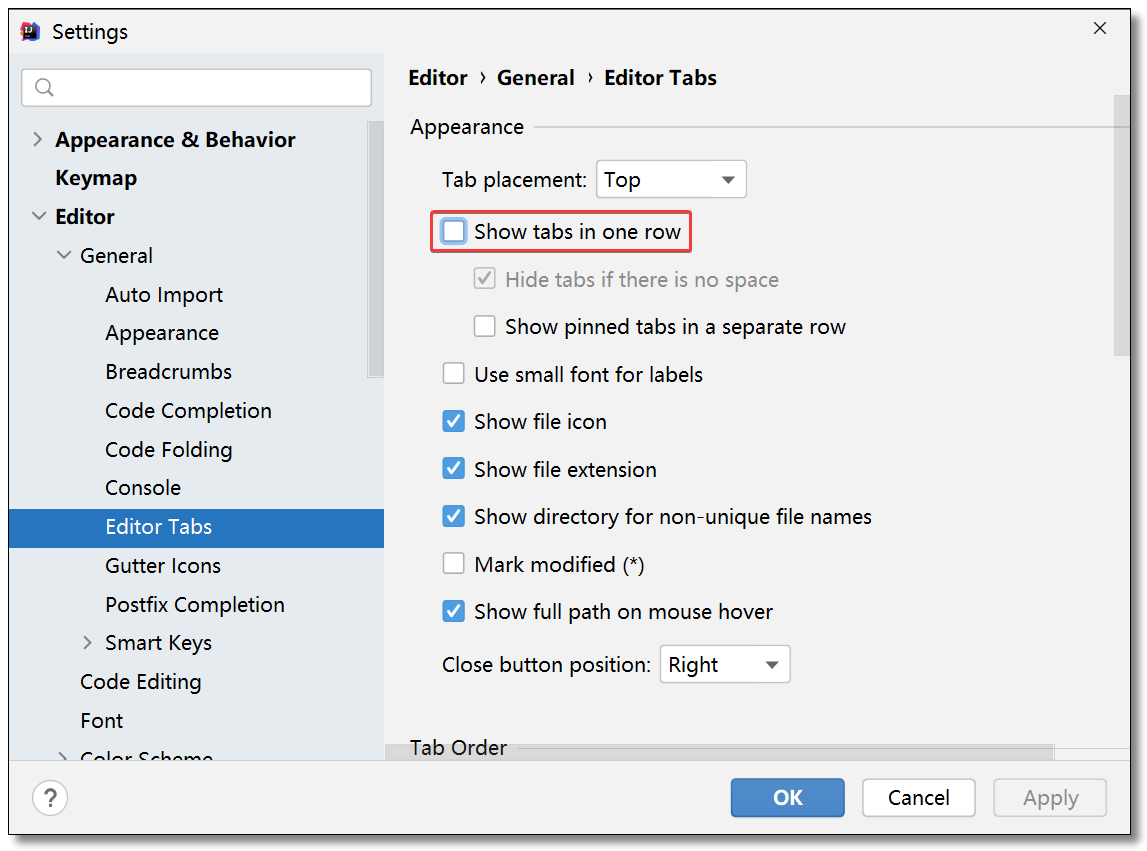
效果如下:

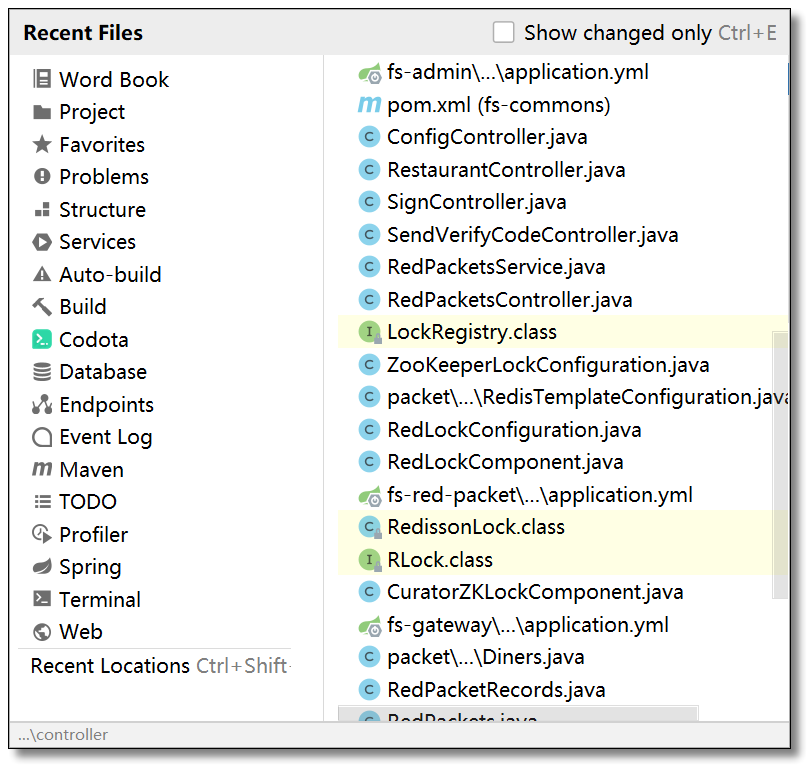
快速打开最近文件
教大家一个小技巧,可以使用 Ctrl + E 打开最近操作过的文件,Recent files limit 设置记录最近使用的文件个数。
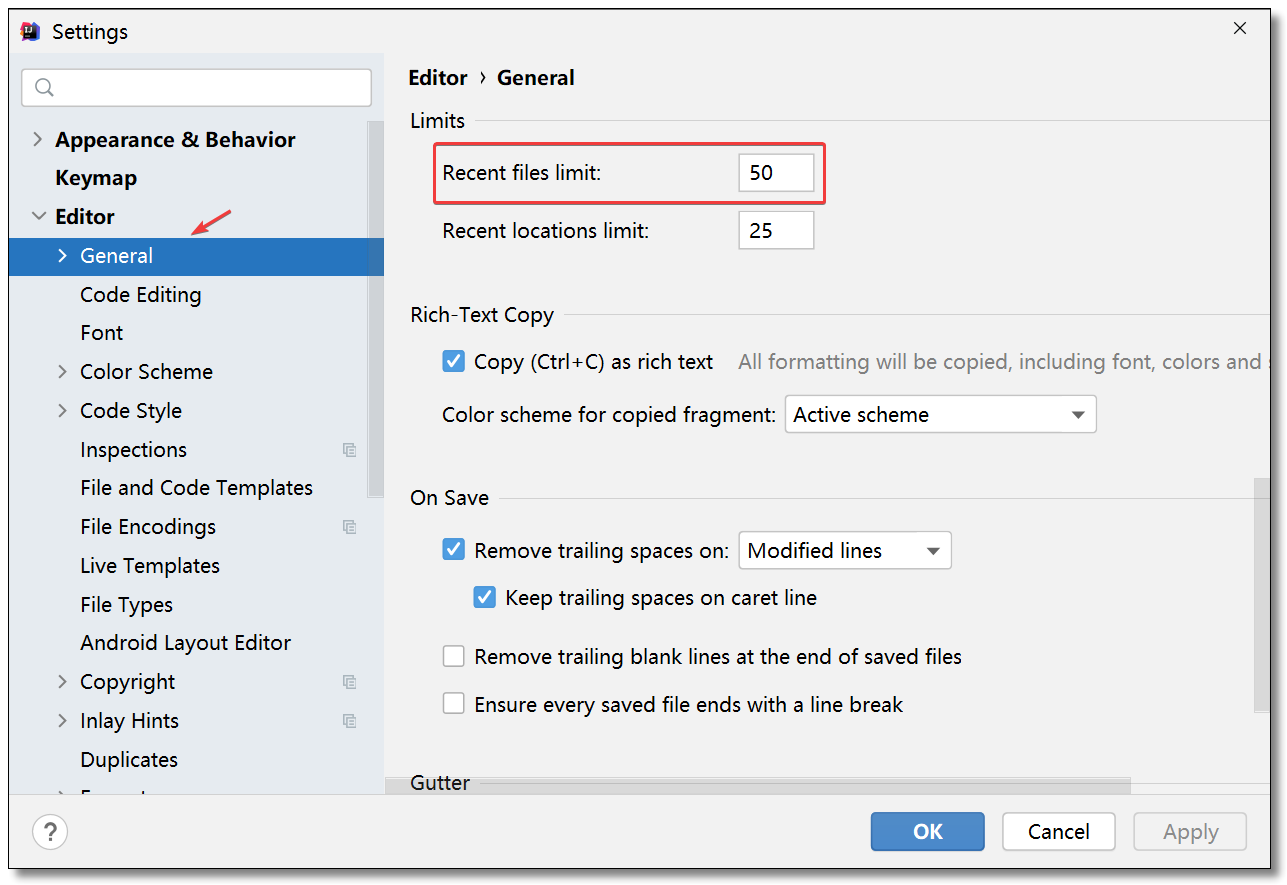
效果如下:
编码字符集
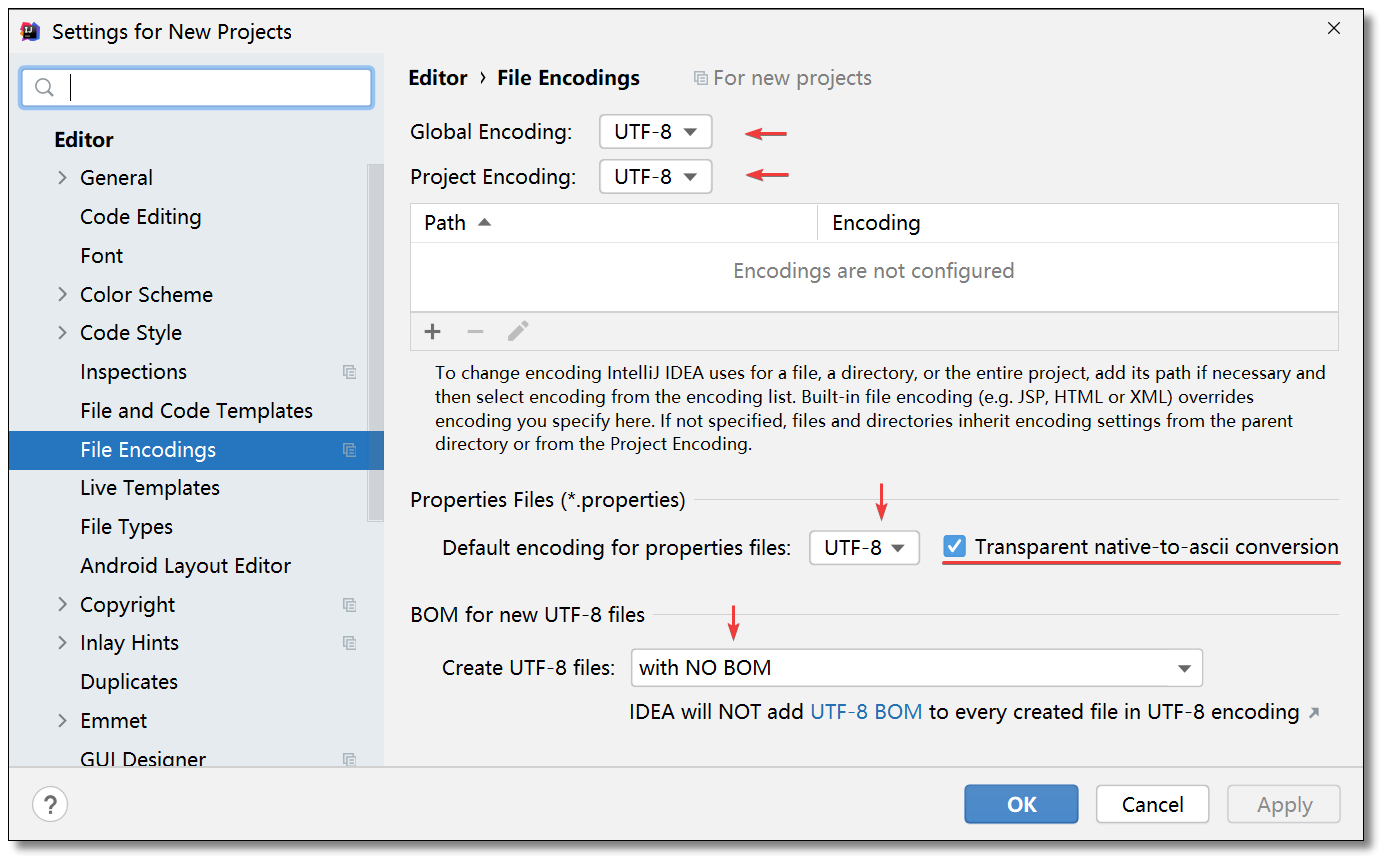
请大家自行了解以下内容,偷懒的同学如上图和我的设置一致即可。
- UTF-8 有 BOM 和无 BOM 的区别
- Transparent native-to-ascll conversion(该设置团队开发时需要统一标准,或者全勾选,或者全不勾)
自动编译
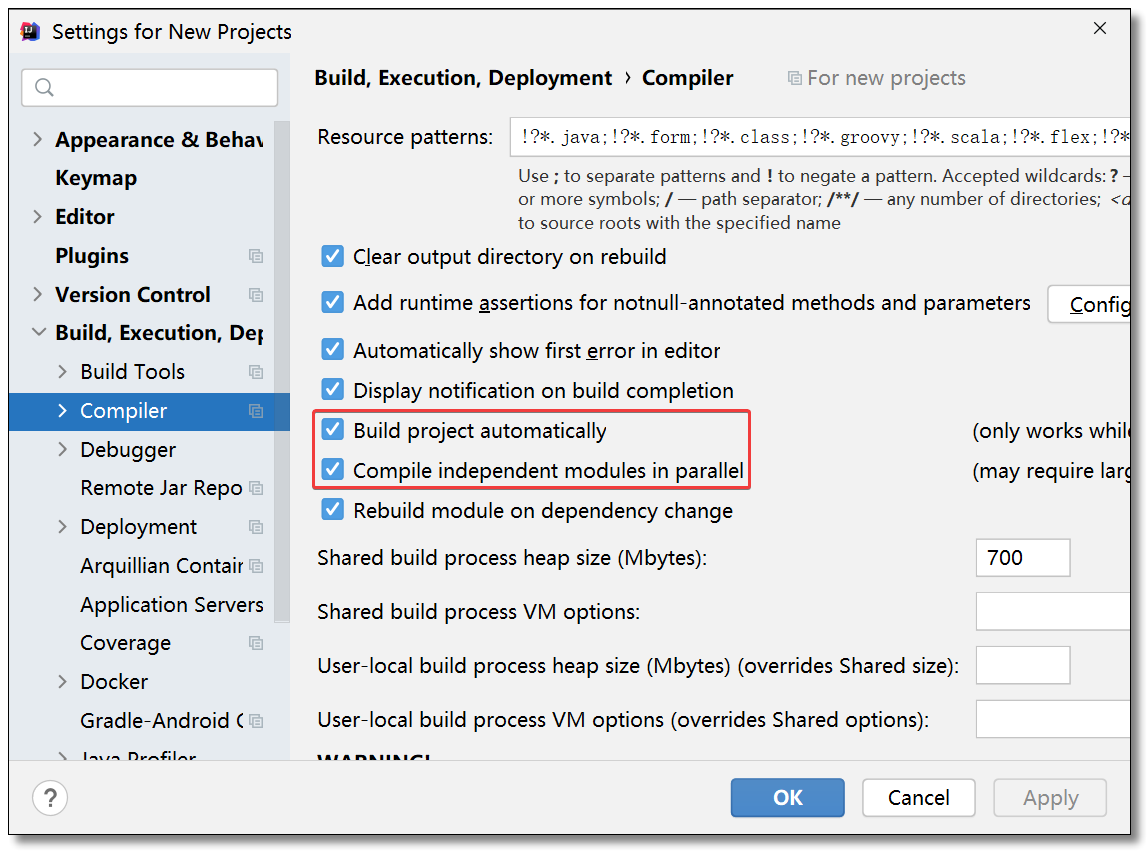
- Build project automatically(自动编译)开启自动编译之后,结合
Ctrl + Shift + F9会有热更新效果 - Compile independent modules in parallel(独立模块并行编译)
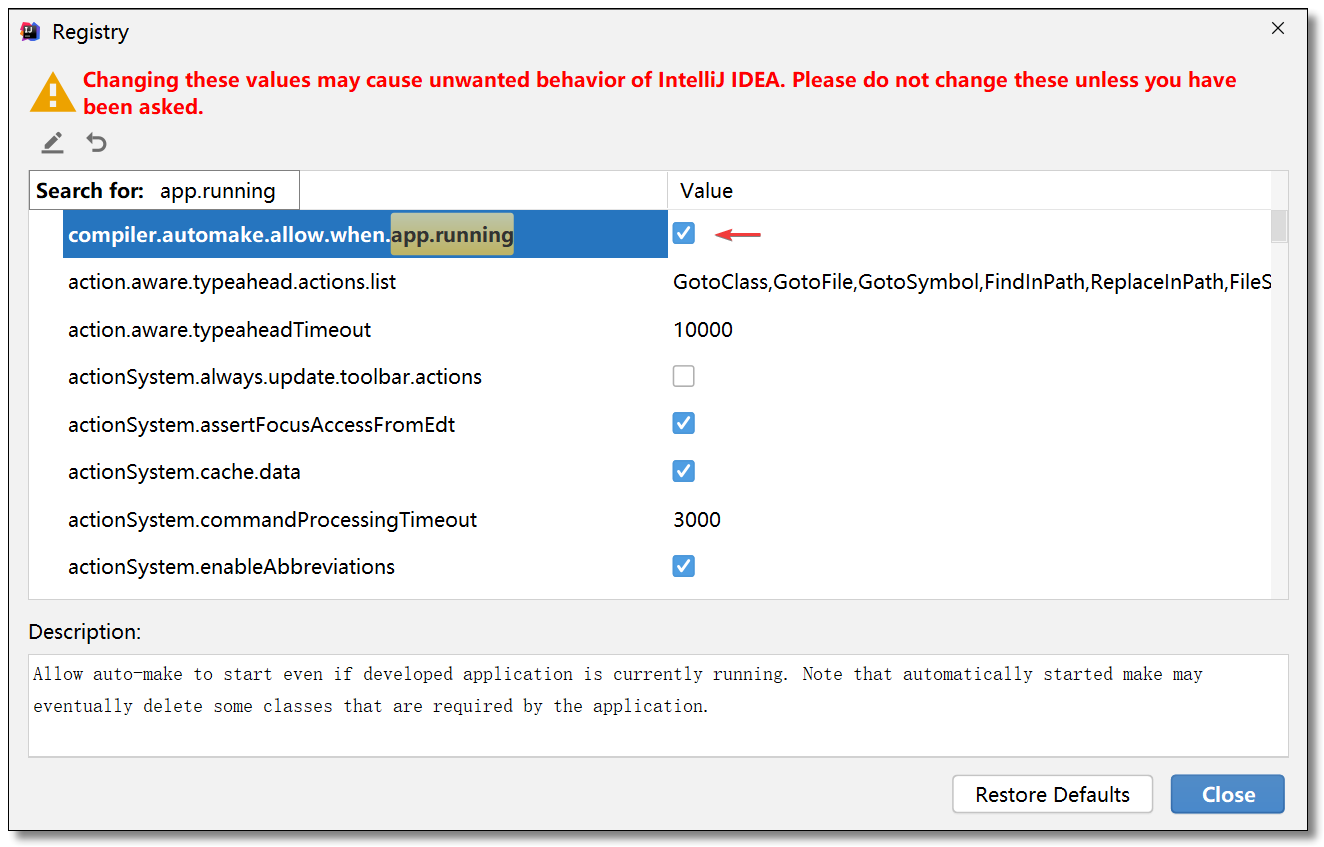
运行时自动编译功能开启步骤:Ctrl + Shift + Alt + / 选择 Registry...,搜索 compiler.automake.allow.when.app.running,然后勾选。
代码显示方式
可以将多个文件采用左右分割或者上下分割显示,对比文件时比较方便。
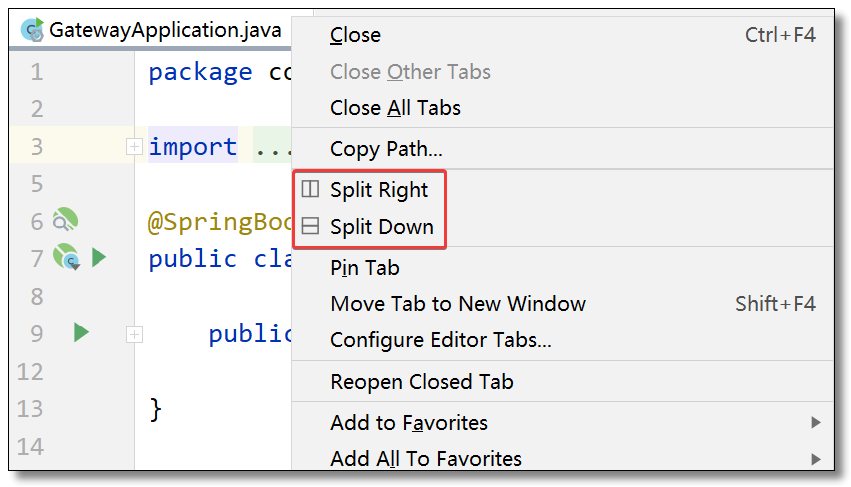
效果如下:
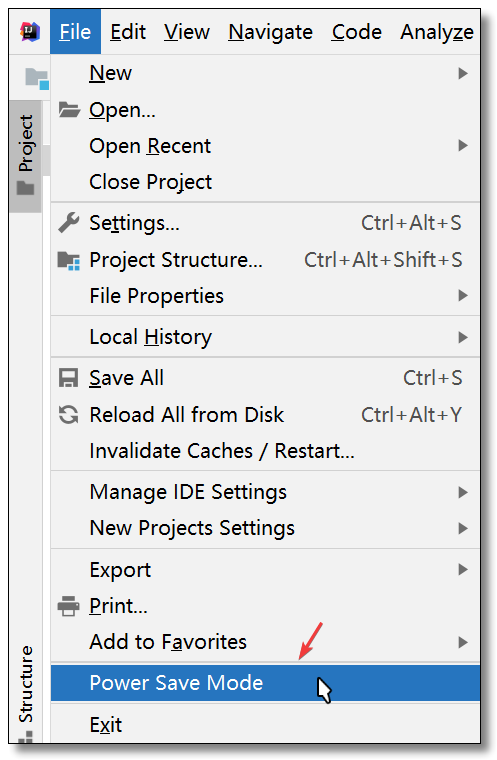
省电模式
关掉代码检查和代码提示等功能,如果你开发时突然遇到代码文件不能进行检查和提示,可以看看该选项是否被开启了。
项目打开方式
如果上次退出时项目处于打开状态,勾选 Reopen projects on startup,下次启动 IDEA 时会直接打开该项目。
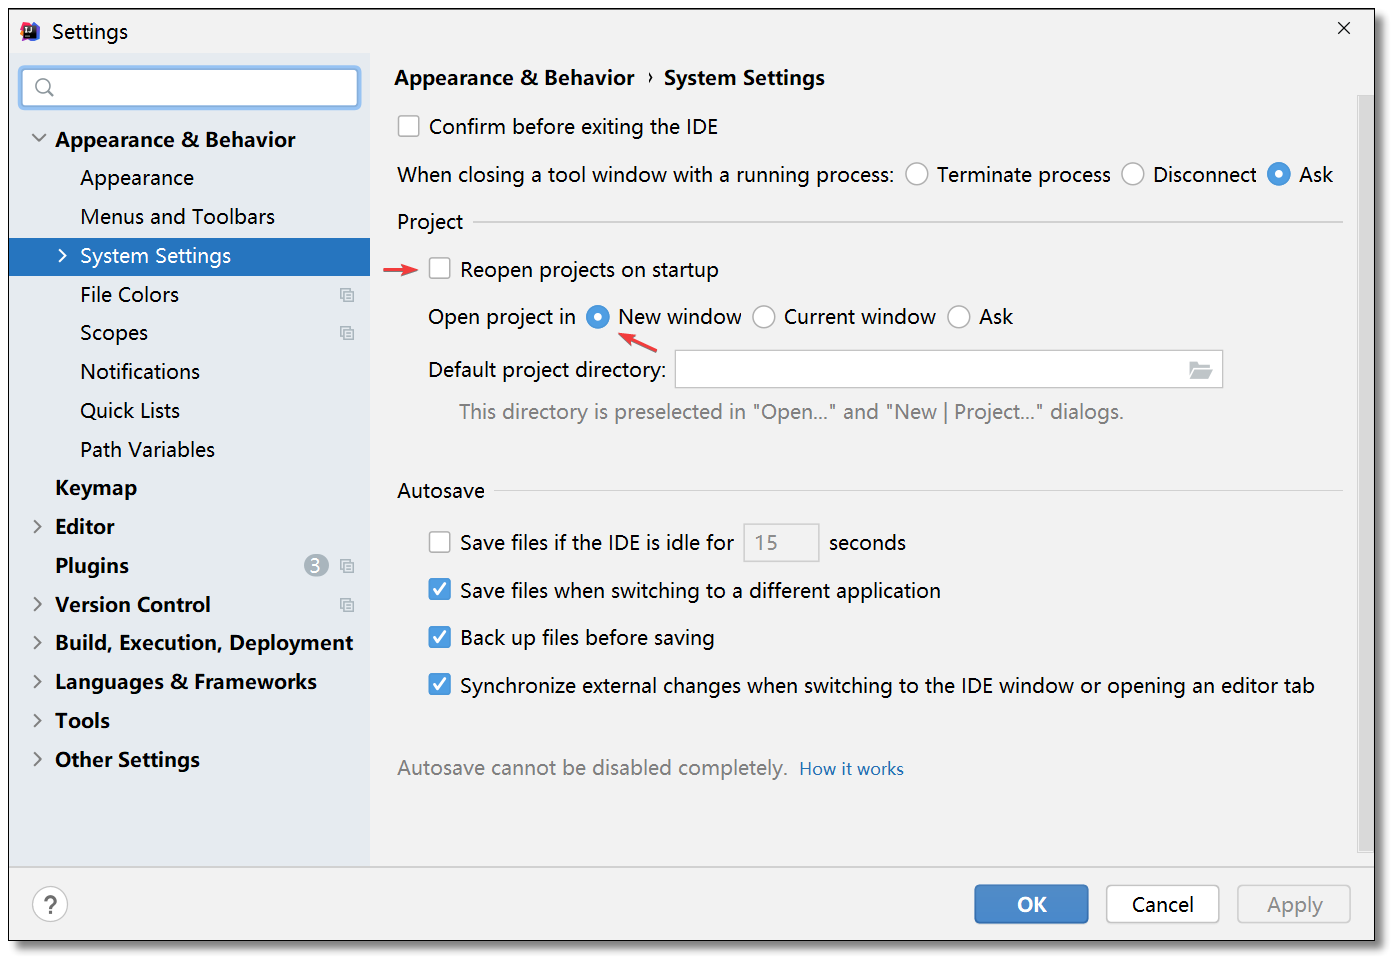
开发时可能会打开多个项目窗口,关于新项目的打开方式如下:
- New window:表示打开新项目会使用新的窗口
- Current window:表示打开新项目会覆盖当前窗口
- Ask:表示打开新项目会询问该如何操作(新窗口还是覆盖当前窗口)
设置 Maven
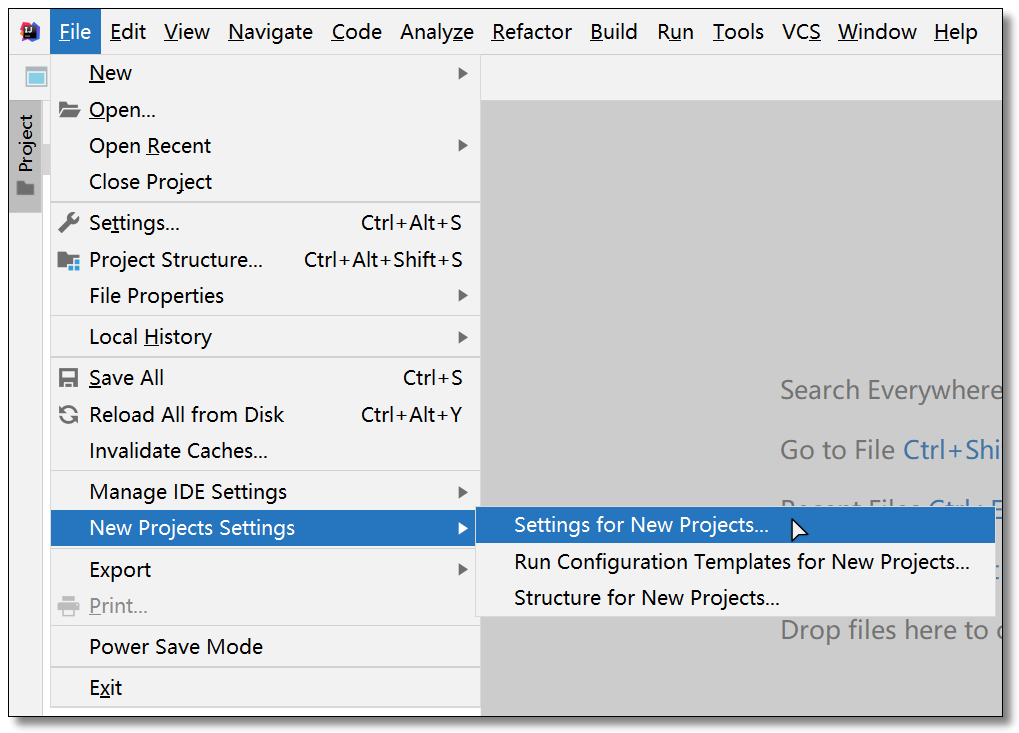
在IDEA的欢迎界面中通过Customize→All settings...配置IDEA的 Maven 默认配置,以后每创建一个 Maven 项目就会使用该配置。

或者随便打开一个项目,通过顶部菜单File→New Projects Settings→Settings for new Projects...也可以配置IDEA的 Maven 默认配置。
接下来在Build Tools中找到Maven并配置 Maven 环境。
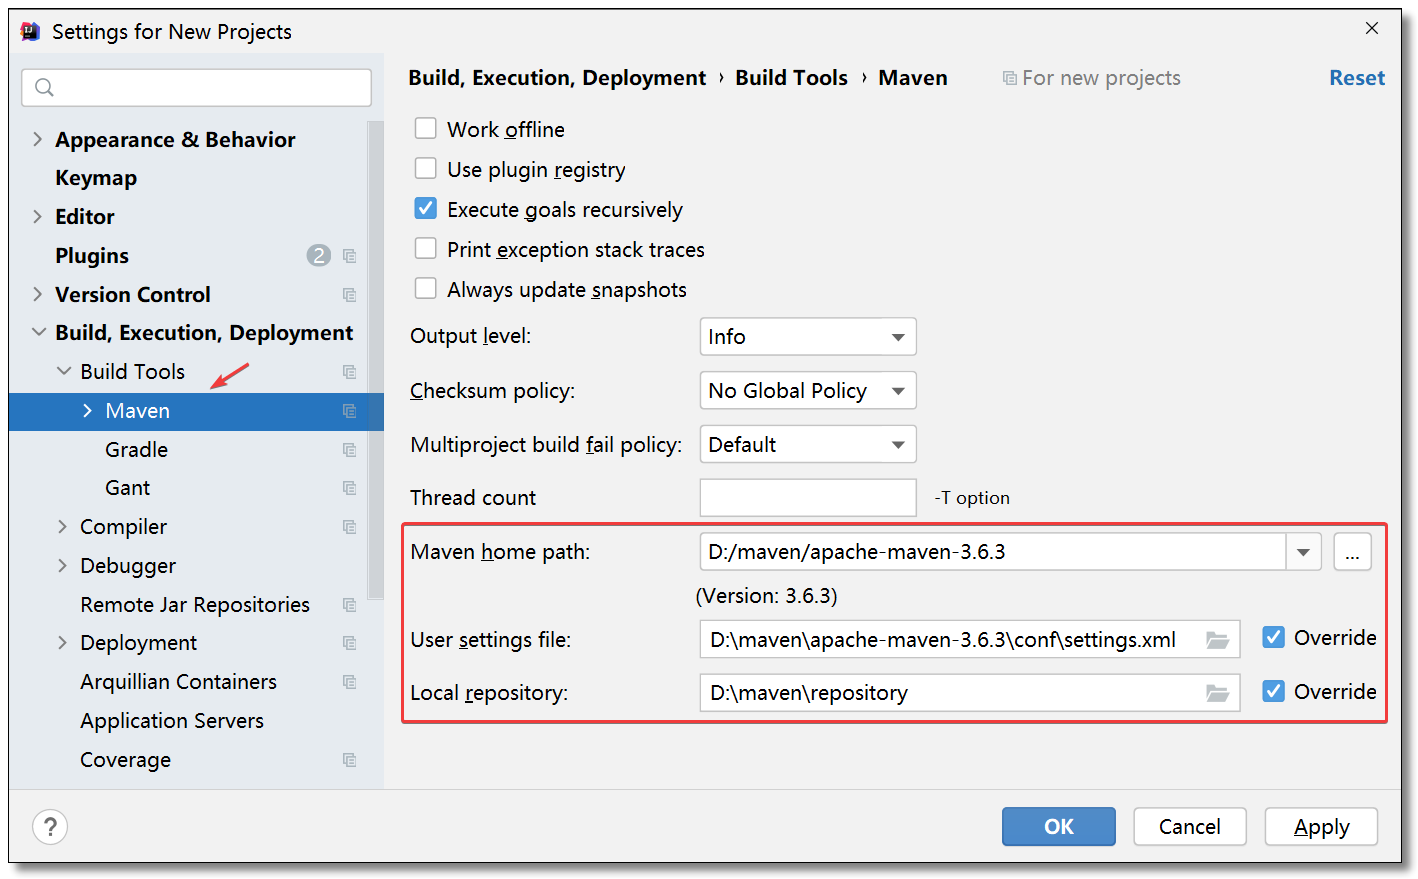
- Maven home path:设置自己本地的 Maven 目录
- User settings file:设置自己本地 Maven 环境下的 settings.xml
- Local repository:设置自己本地的 Maven 仓库
历史记录
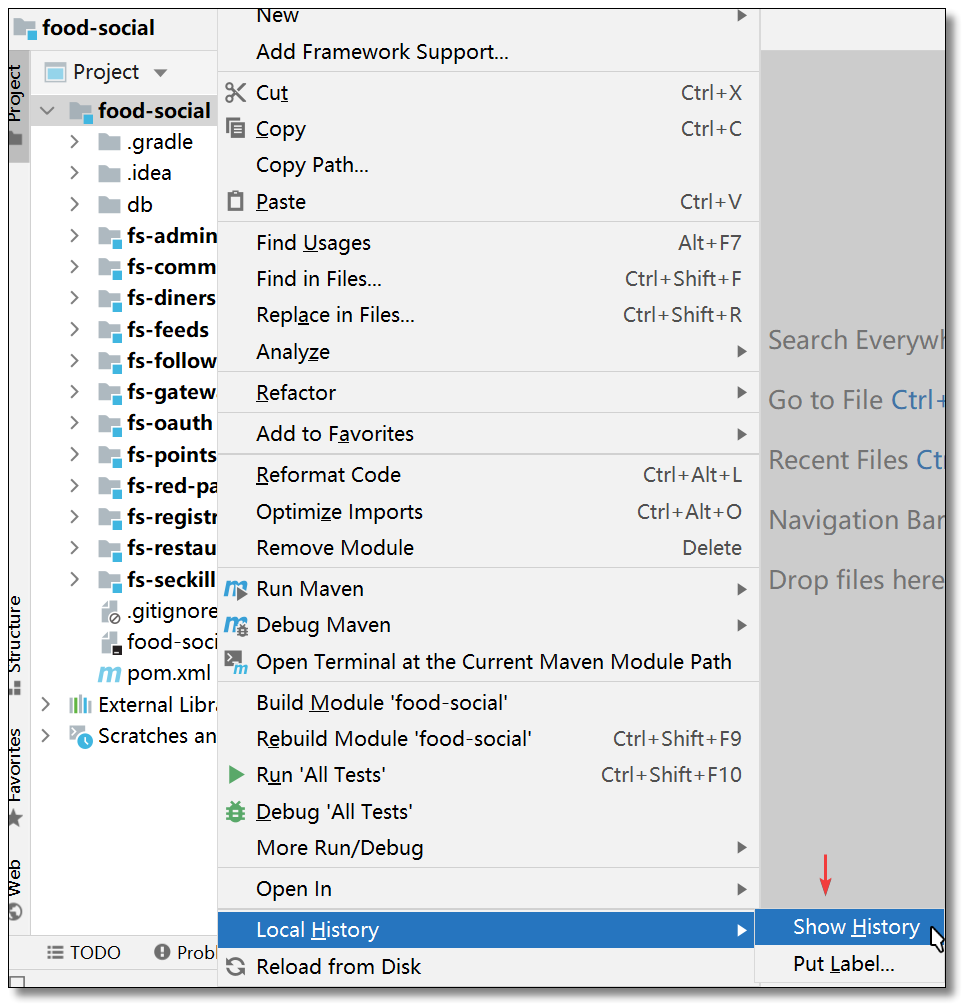
开发项目最头疼的就是代码版本迭代管理,不过这个问题可以通过版本控制工具 Git、SVN 等工具来解决。对于某些喜欢偷懒的同学不添加版本控制就直接开撸代码,万一出错需要回滚怎么办?IDEA 还提供了本地历史记录功能,方便回滚。项目右键 -> Local History -> Show History。
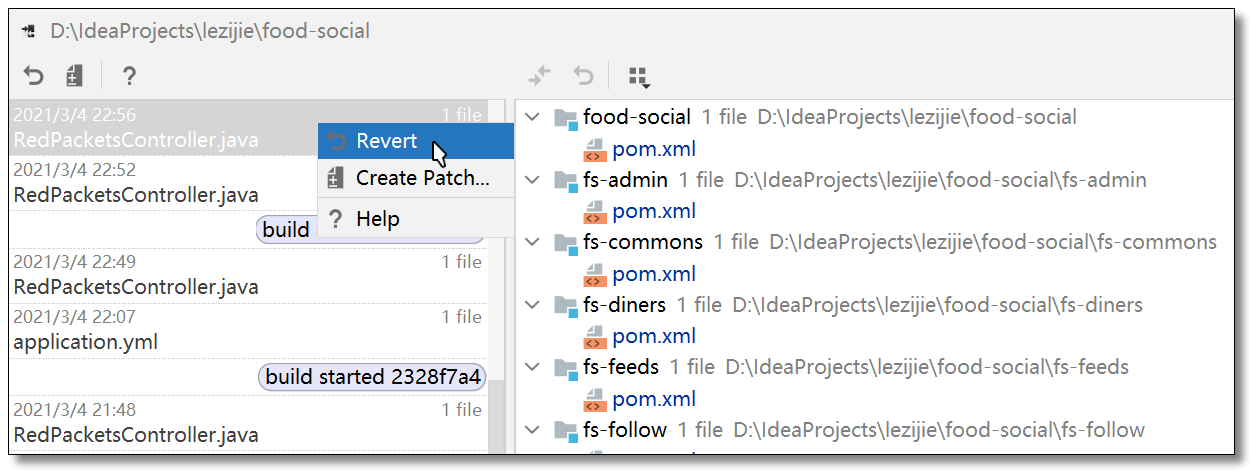
找到自己之前的某个时间线 鼠标右键 -> Revert 进行回滚。
导出/导入配置
辛辛苦苦配置这么久,万一重装系统怎么办,或者升值加薪换了一台新的战斗利器,又得重头来一遍。别急,IDEA 支持配置导出,下次安装 IDEA 直接导入配置即可。
导出配置
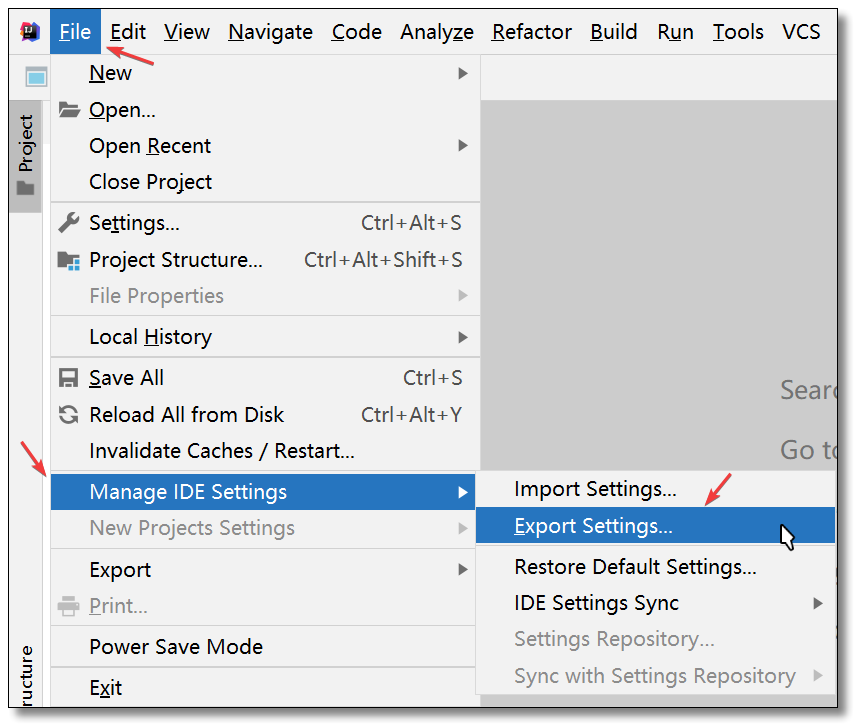
File -> Manage IDE Settings -> Export Settings,选择导出目录点击 OK,会导出一个 settings.zip 文件。
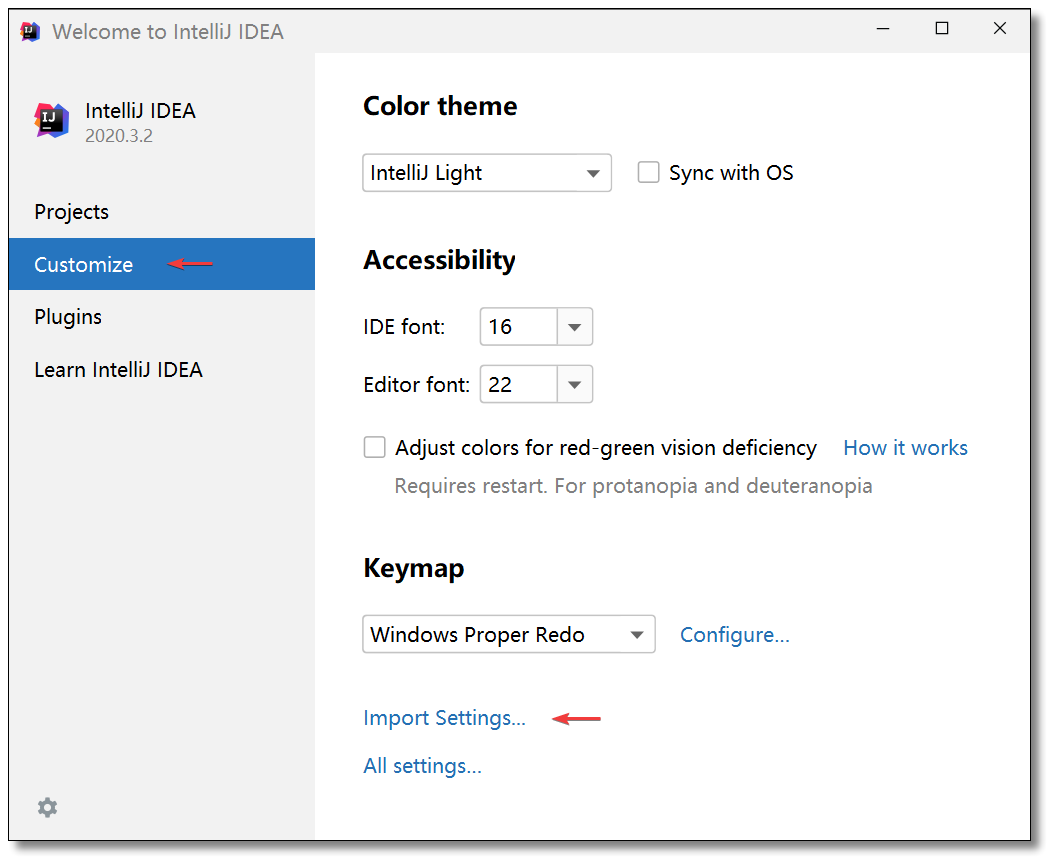
导入配置
欢迎界面选择 Customize,然后点击 Import Settins 选择自己的 settins.zip 文件即可。
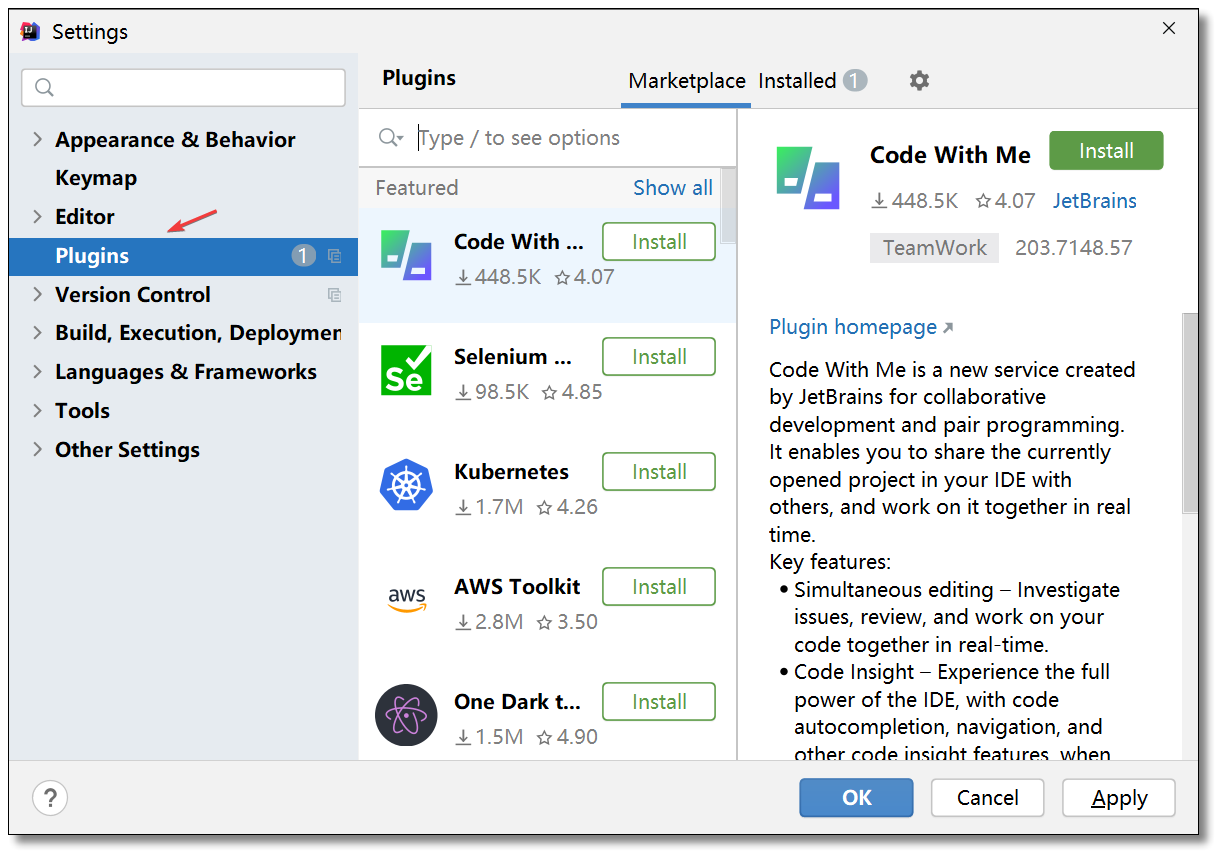
插件
其实这种方式只能导出配置相关的数据,IDEA 强大的地方还在于可以安装很多实用的插件,通过导出的方式插件并不会一并导出,所以下次即使重新导入了配置,插件还是需要手动去一个个安装。
插件安装方式如下,后续我会分享我平时使用较多的插件给大家。什么?你的 IDEA 快到期了?嘘!快去看:一个插件搞定 Jetbrains 系列产品永久试用(仅供学习使用,不得用于商业用途!)
后期我们也可以通过注册 Jetbrains 账号的方式将所有配置及插件一并同步至云端,下次安装 IDEA 只需要登录自己的账号然后同步配置与插件即可,关于这方面的内容等我分享完插件以后会单独写一篇文章教大家如何操作。
至此 IntelliJ IDEA 配置篇就到这里啦,好东西记得要分享哦,欢迎大家推荐博主给身边的小伙伴,感谢!

本文采用 知识共享「署名-非商业性使用-禁止演绎 4.0 国际」许可协议。
🤗 您的点赞和转发是对我最大的鼓励和支持。
📢 扫码关注 哈喽沃德先生「文档 + 视频」每篇文章都配有专门视频讲解,学习更轻松噢 ~

「 感谢支持 」


- 文章链接:https://mrhelloworld.com/idea-settings/
- 版权声明:本站所有文章除特别声明外,均采用 CC BY-NC-ND 4.0 转载请注明来自 哈喽沃德先生